Manage users, groups and roles
The users and groups management functionality allows administrators and superusers to manage user accounts, groups, and roles.
Each user can belong to one or more groups. A Group is a set of users that share access rights to a given folder/file. For example, as a member of the “Sales” group, a user can access files or folders that have been shared with this group.
Every user has one role. For example, a user can have an Analyst role, a Model Designer role, a Viewer role, or an Administrator role. The role of a user determines the features of Apromore that are accessible to the user. For example, an Analyst can create and edit dashboards and filters, whereas a Model Designer cannot. On the other hand, a model designer can edit process models, whereas a viewer cannot edit process models and can only view process models.
Note
Only a user with a Superuser or Administrator role can access the Manage users and groups functionality.
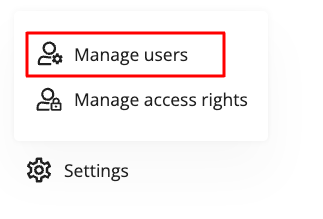
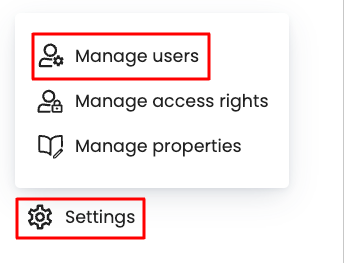
To access the functionality for managing users, groups, and roles, click Settings at the bottom left of Portal.

Click Manage users.
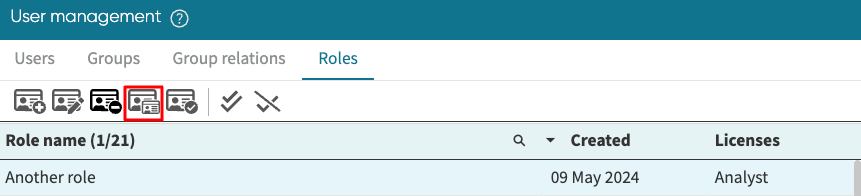
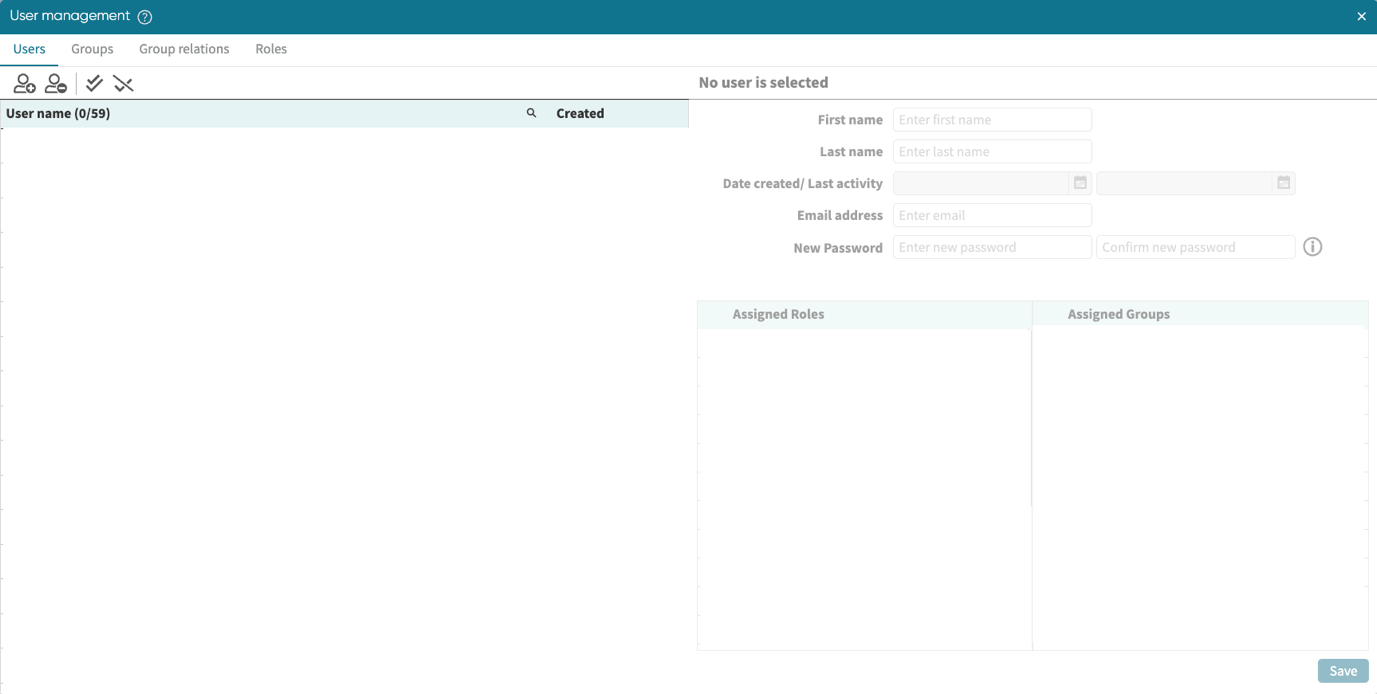
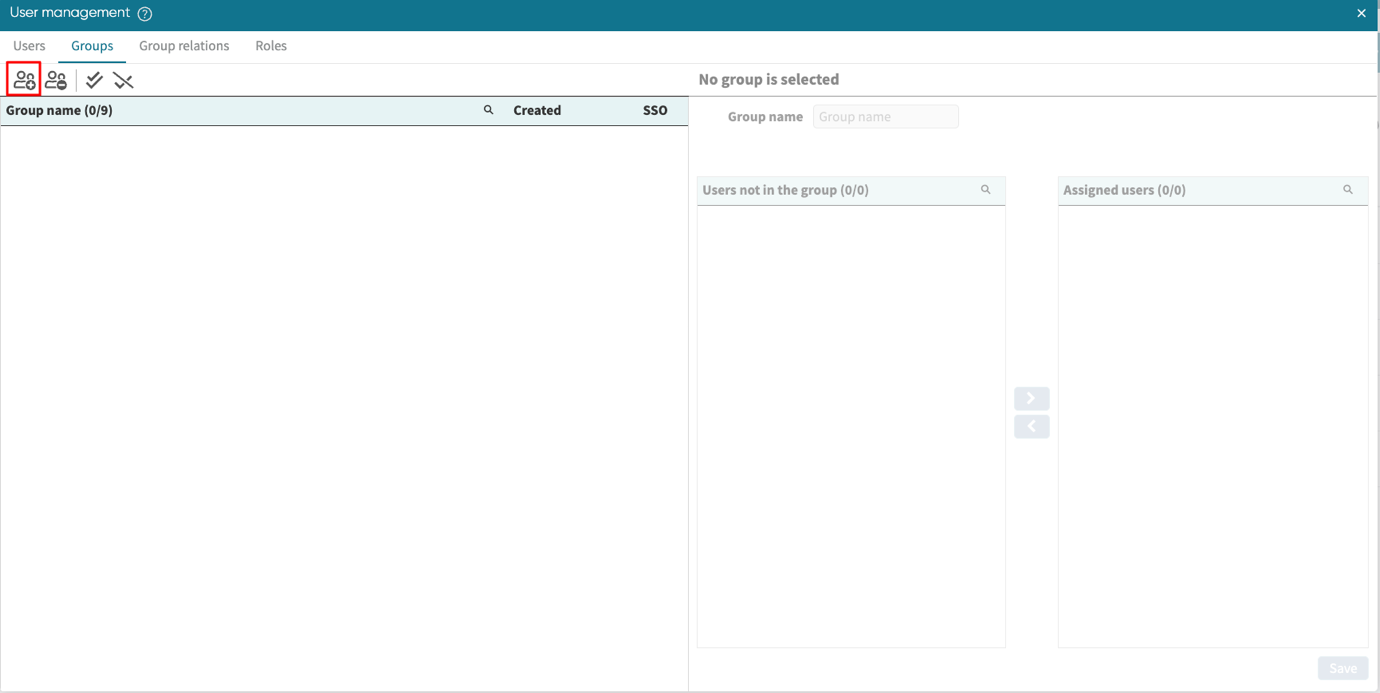
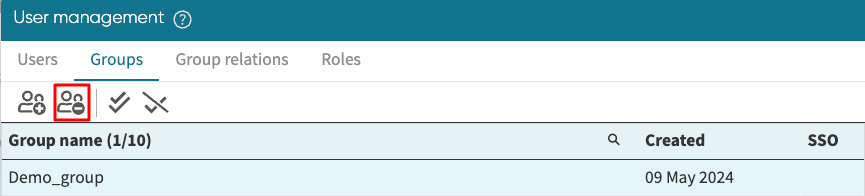
The User management window opens, containing four tabs: Users, Groups, Group relations, and Roles. We can create or remove a user, create or remove a group, create or remove a group relation, create, remove, or clone role(s), and assign users different roles and groups.
Create new user
To create a new user, click on the Create new user icon.
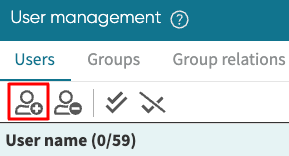
Enter all the details in the Create new user dialogue and click Create.
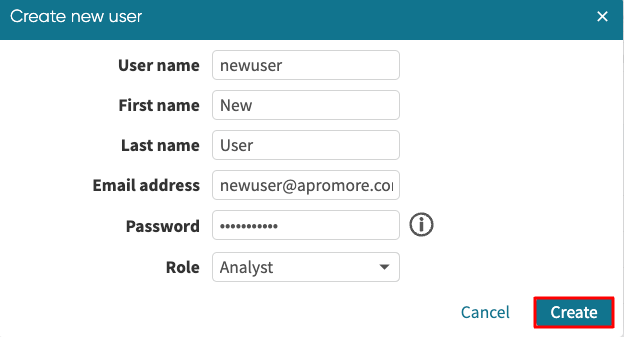
The user will be created.
Note
If your Apromore tenancy is connected to a corporate Single Sign-On (SSO) system such as your corporate Azure Active Directory or Okta, users should normally not be created manually using the above method. In such tenancies, a new user account is automatically created when a user logs in for the first time to Apromore.
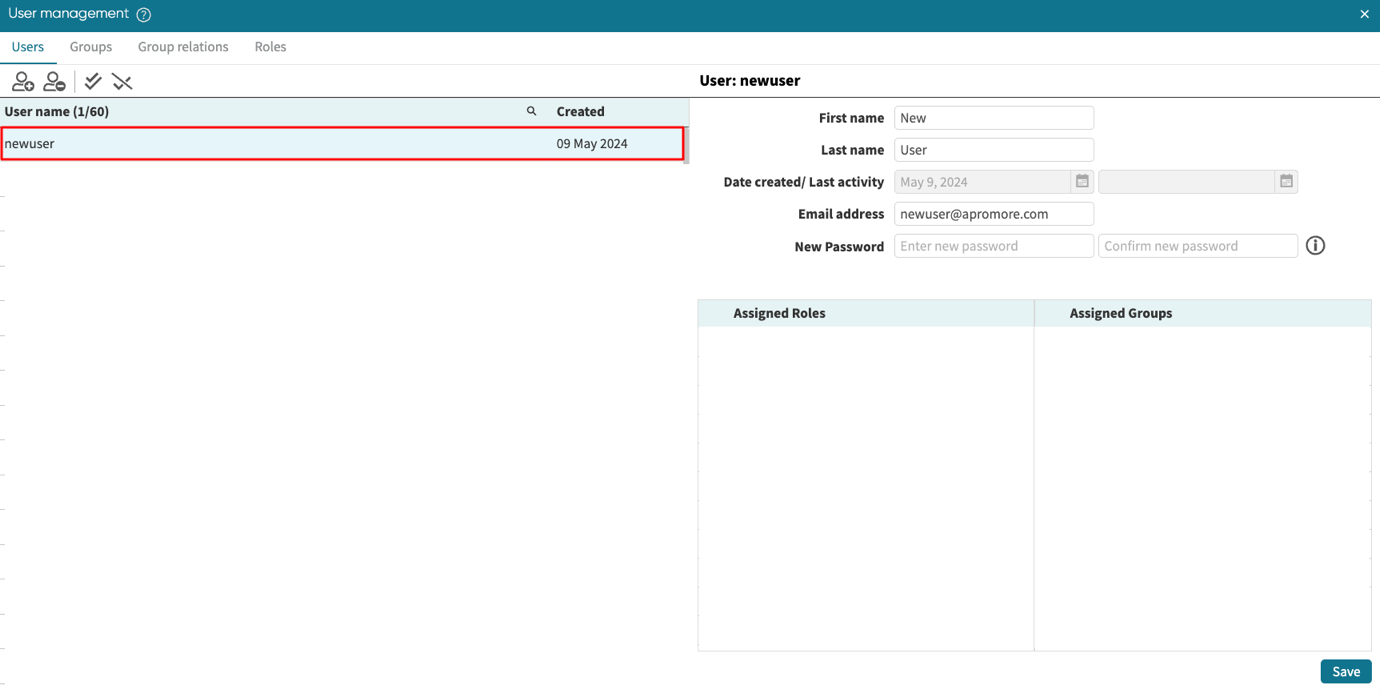
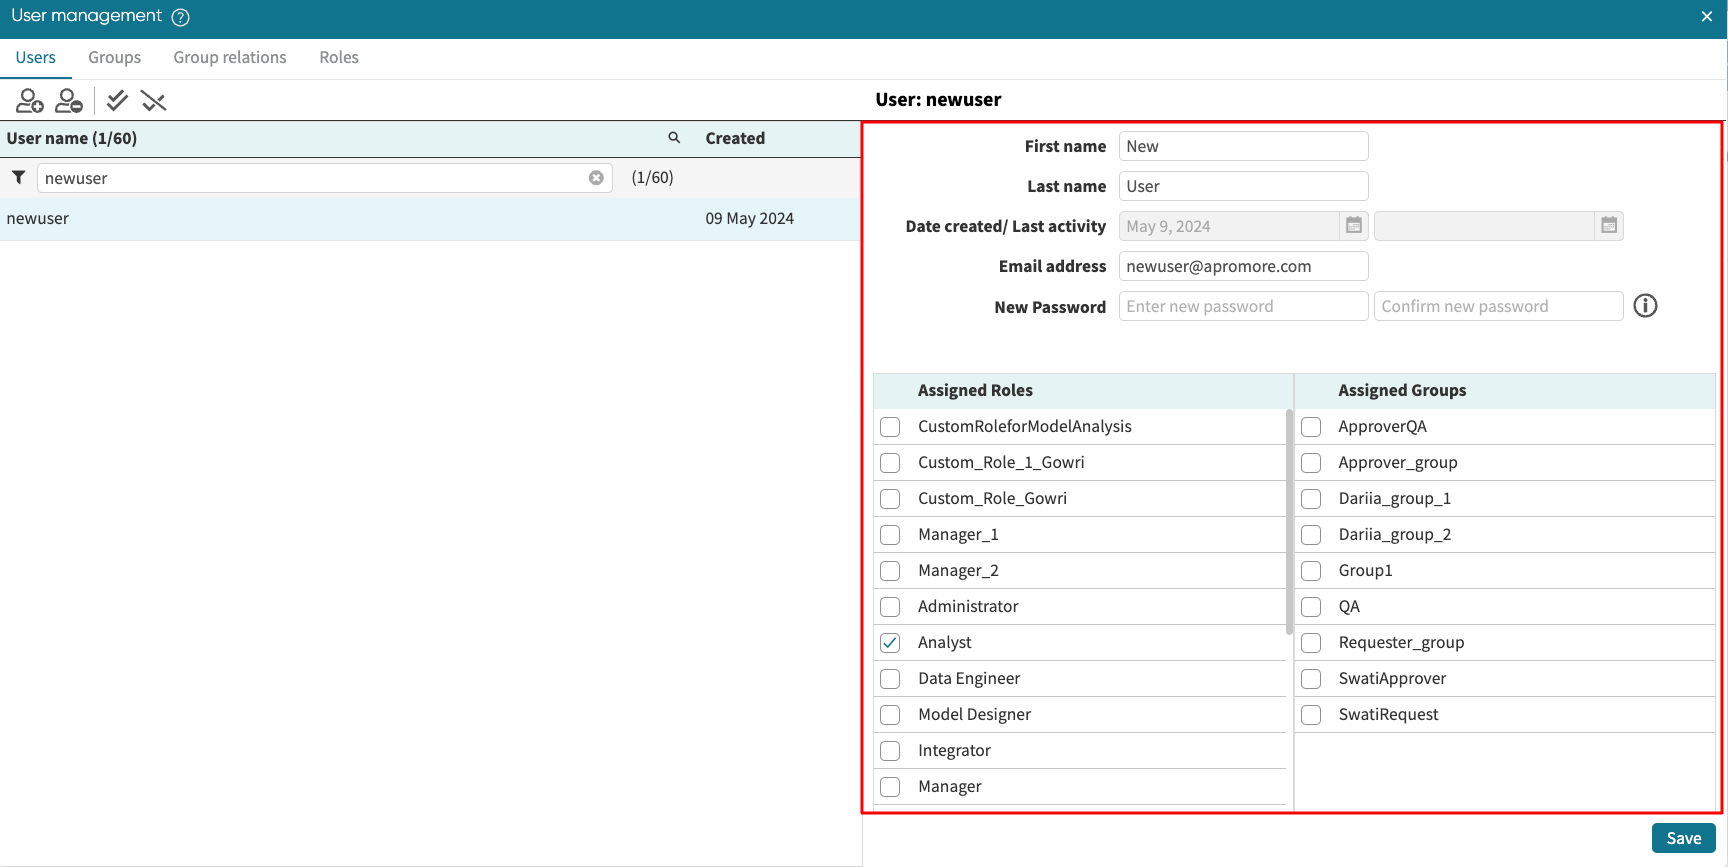
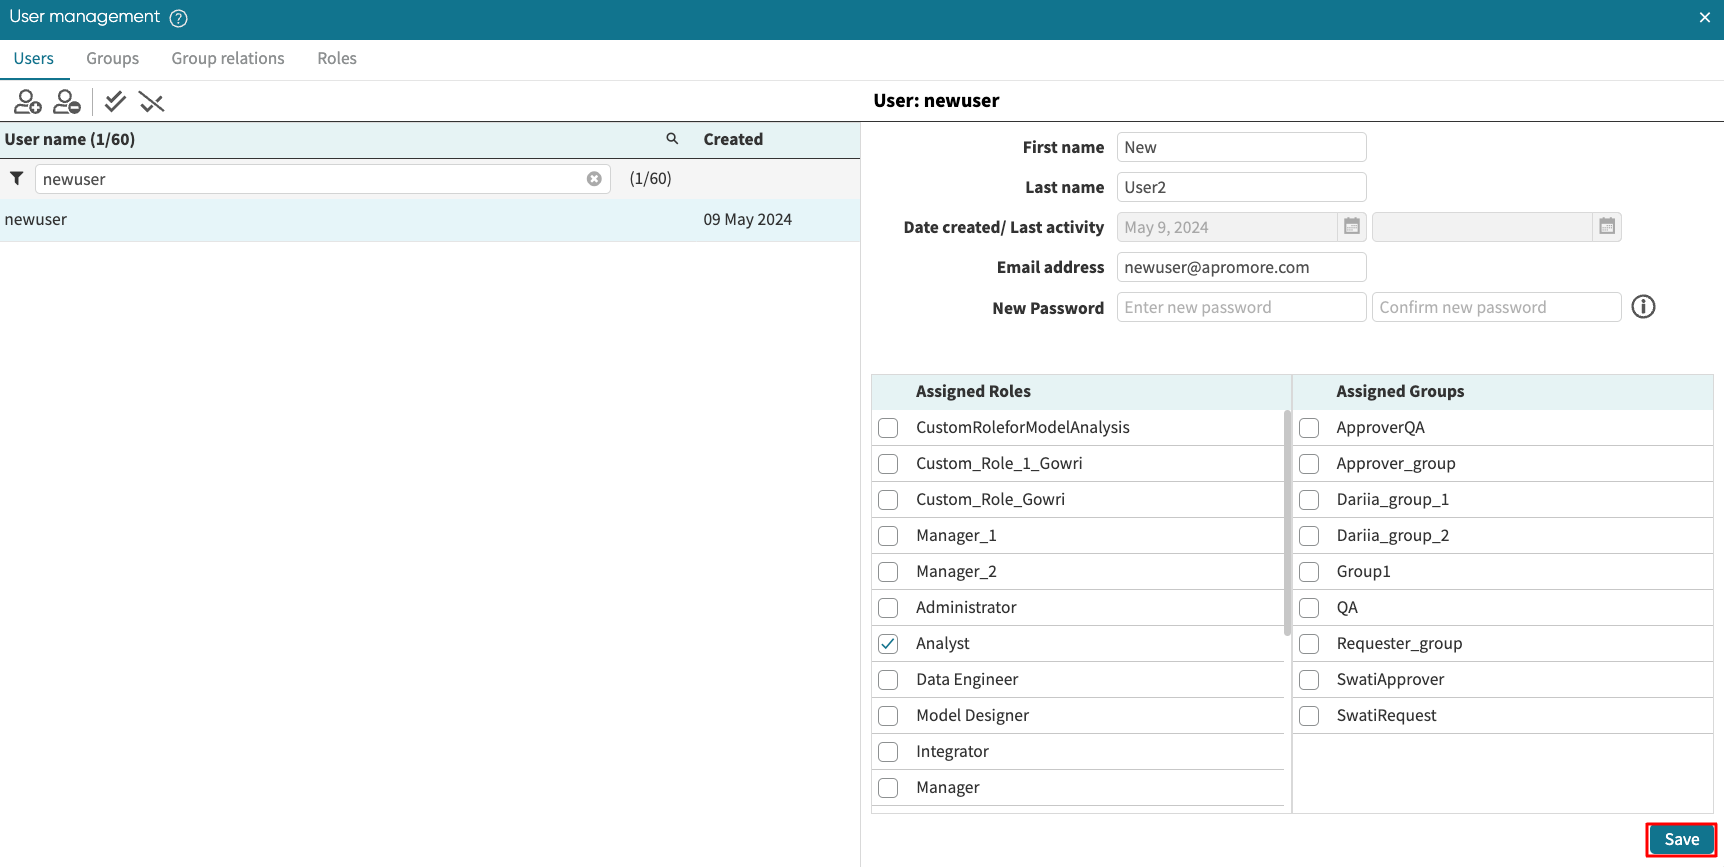
Edit user information
We can edit the information of an existing user in Apromore. Specifically, we can edit the user’s first name, last name, email, and password. We can also change the assigned roles and assigned groups of the user.
To edit a user’s information, in the Users tab, search for the user using the search bar and select the user.
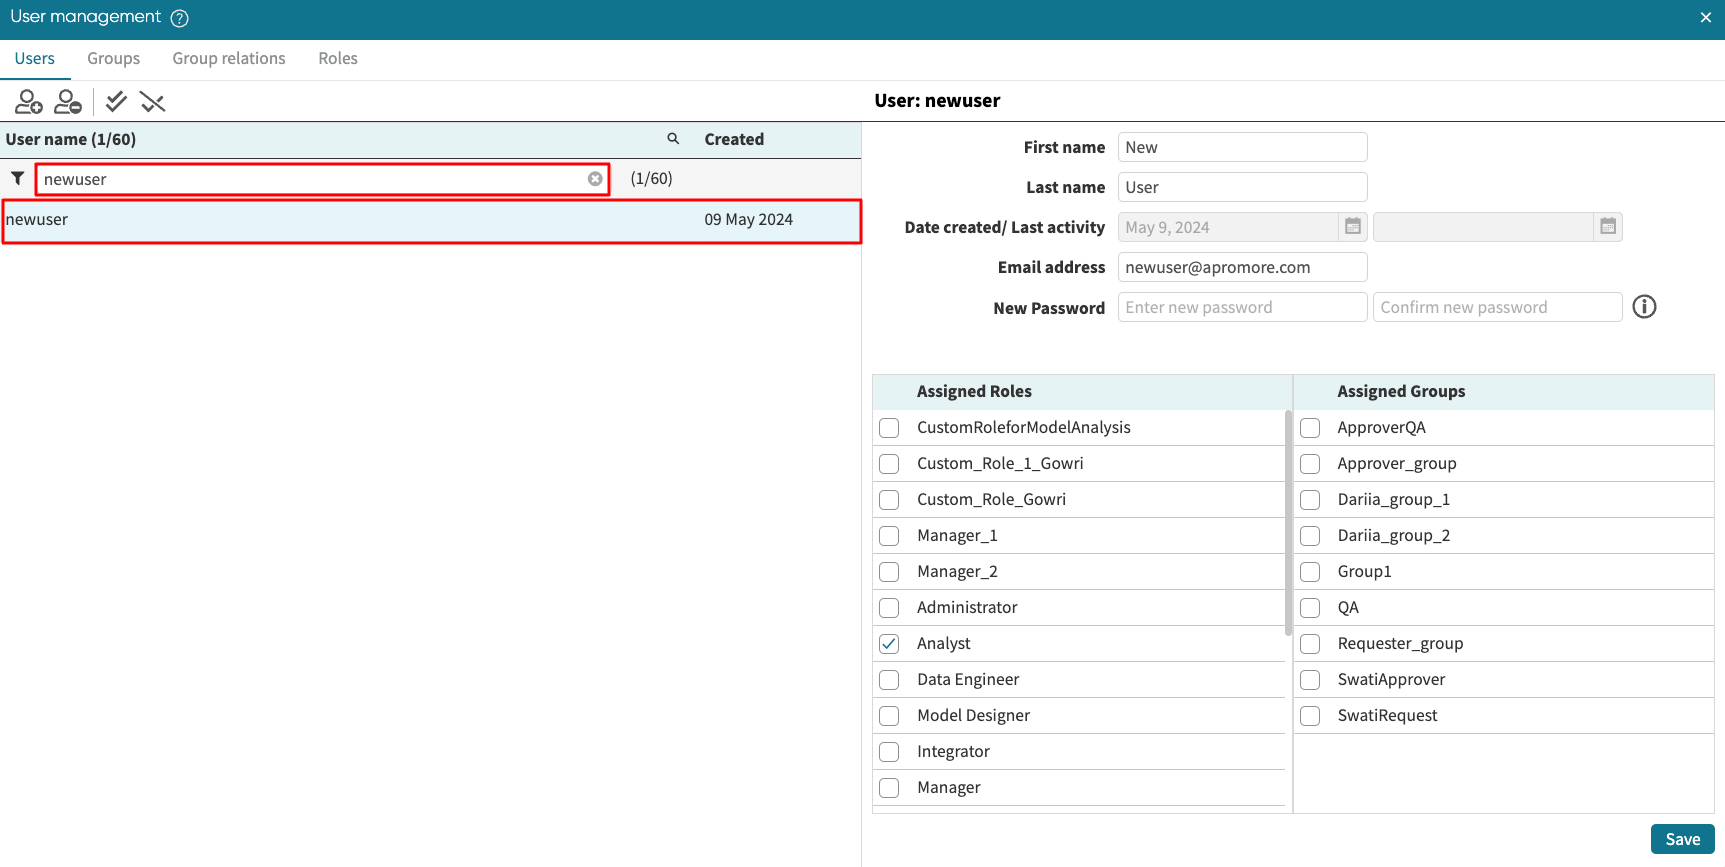
The user’s information appears to the right. We can now make changes to the user information.
Note
We cannot change the username of an existing user.
Click Save to confirm the changes.
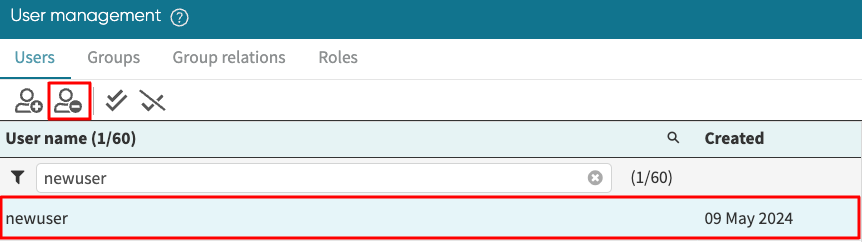
Remove user
To delete a user, select the user you want to delete and click on Remove user icon.
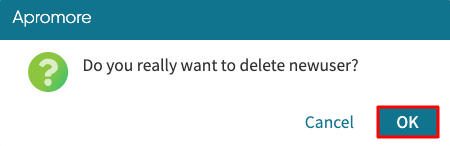
A confirmation question window appears. Click on OK to delete the user.
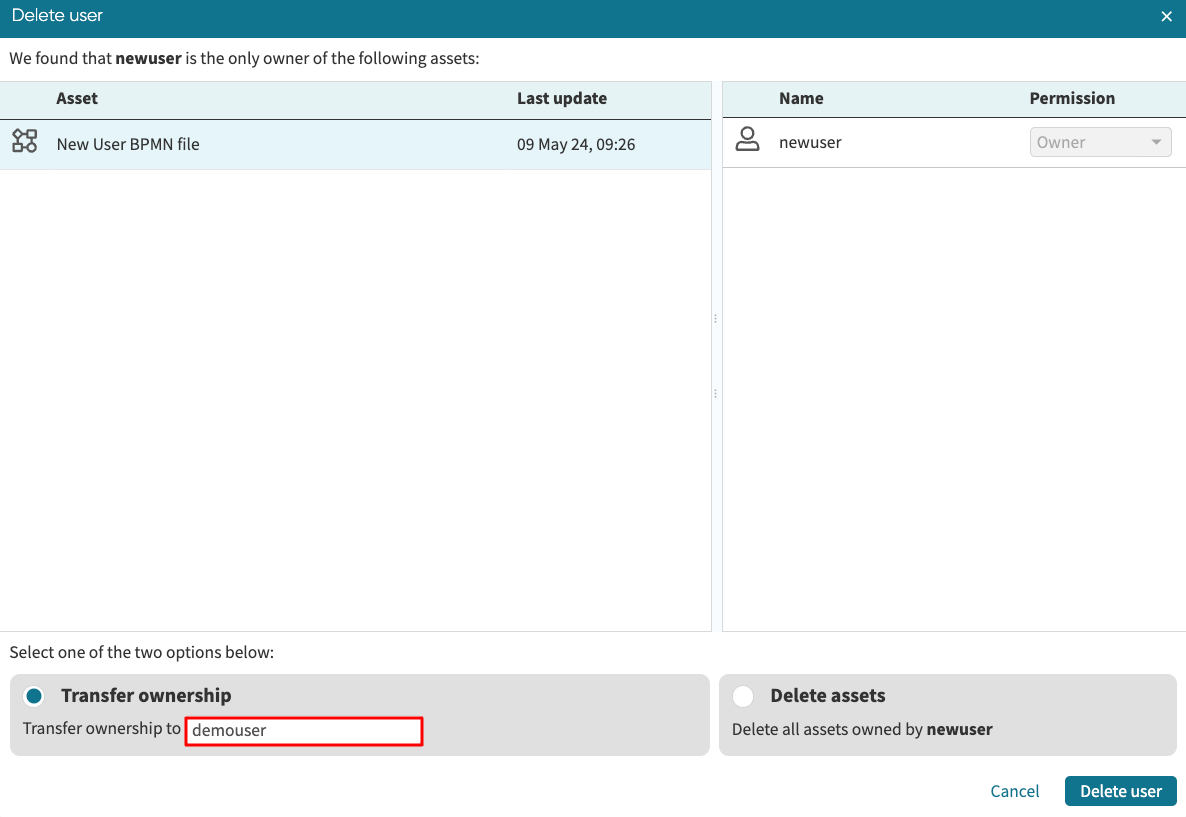
If the user owns some assets (or files) in their Apromore Workspace, we are prompted to either delete the assets or transfer the ownership of the assets.
If we don’t want to lose the user’s files in their workspace, we can transfer them to another user.
To transfer file ownership, select Transfer ownership in the bottom left corner of the Delete user window.
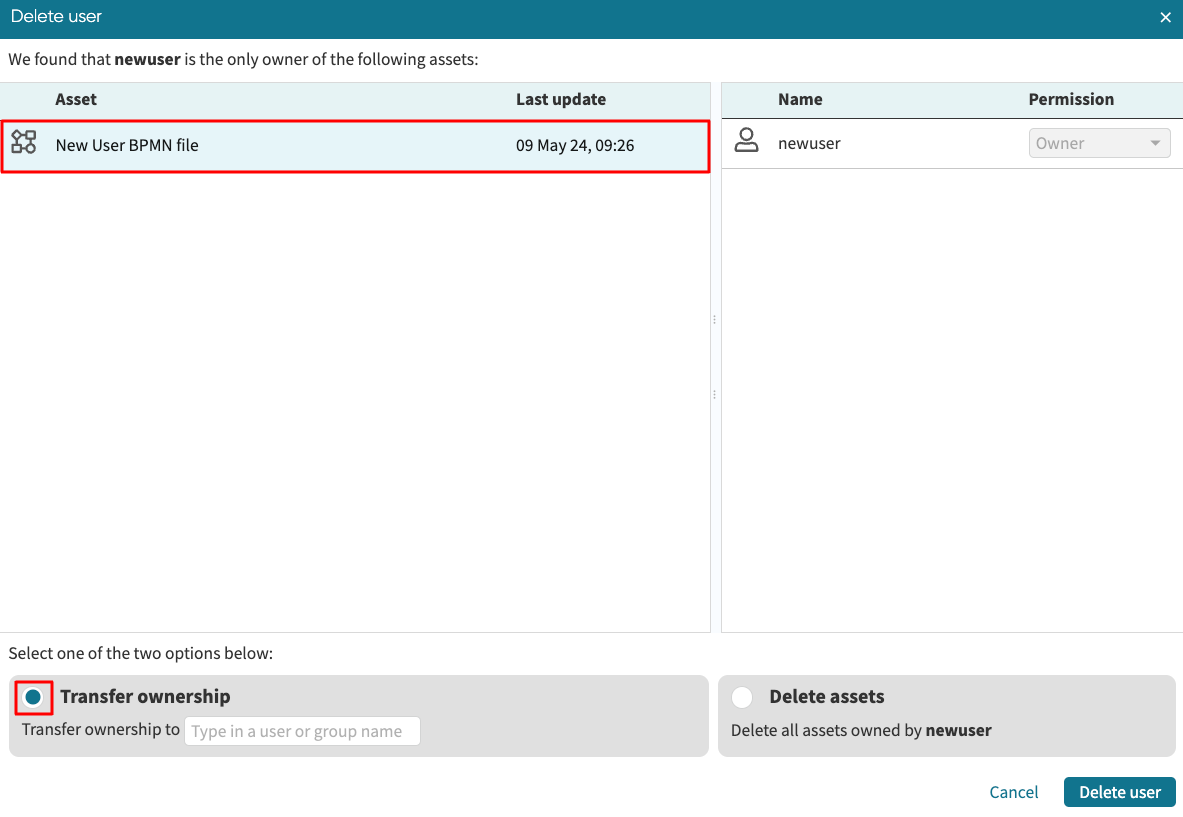
Specify the name of the user to whom we want to transfer the files.
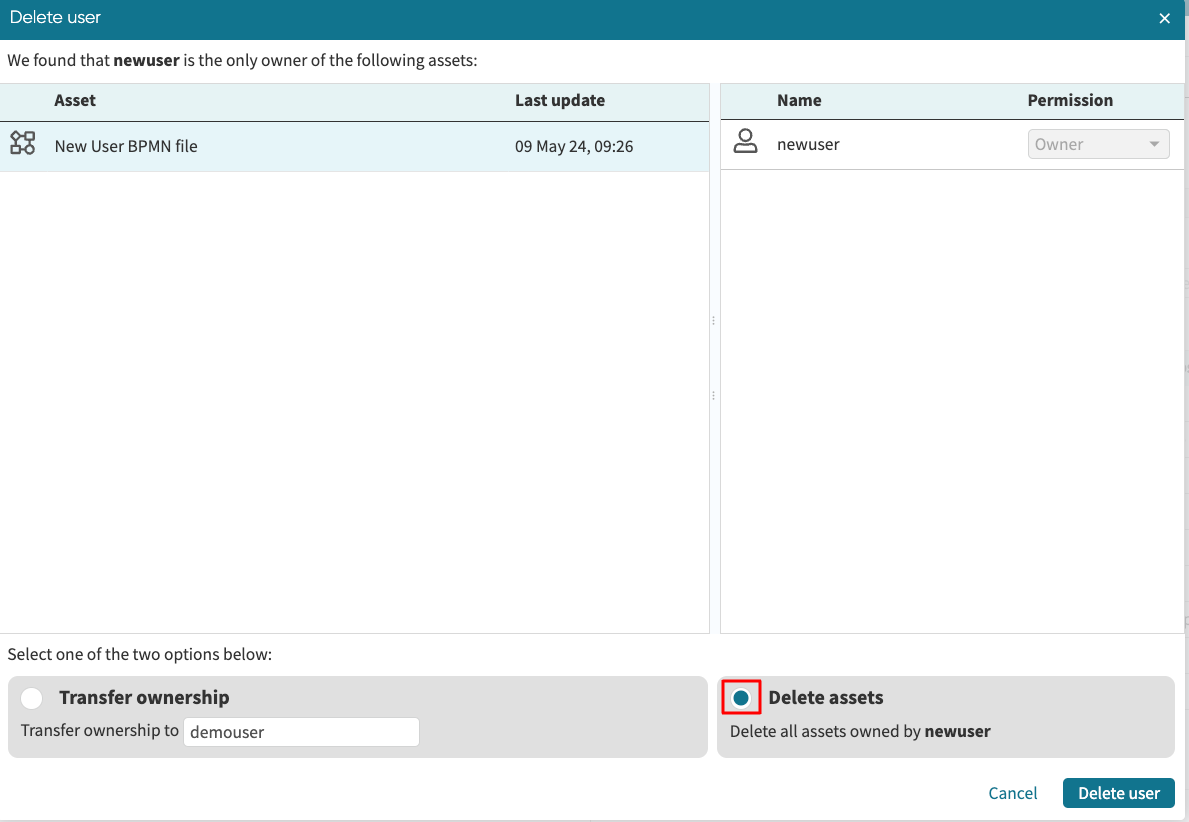
If, on the other hand, we want to delete the files without transfering ownership, select Delete assets.
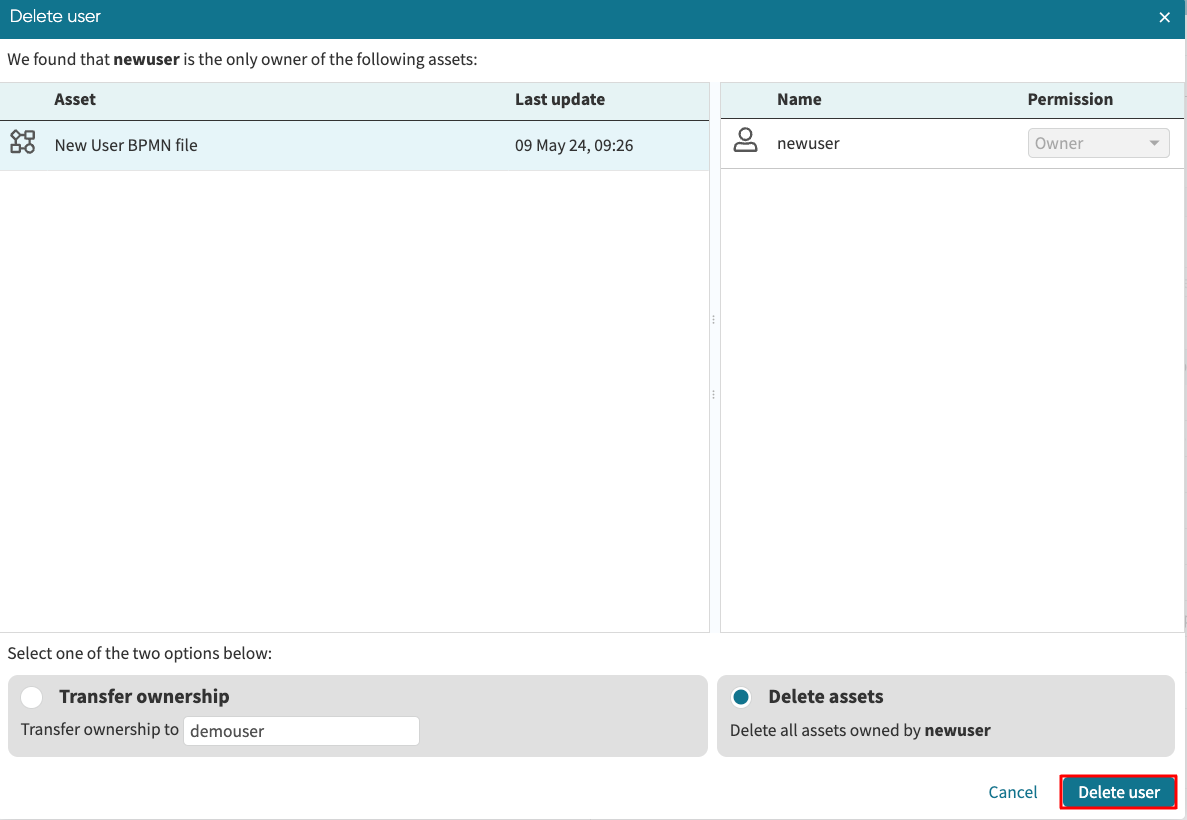
Click Delete user to finalize the process.
Note
If the user didn’t have any logs/folders in their workspace, the user will be deleted right after we click on OK in the confirmation window.
Create new group
To create a new group, click on Create new group button in the Groups tab.
Enter the name of the group and click Create.
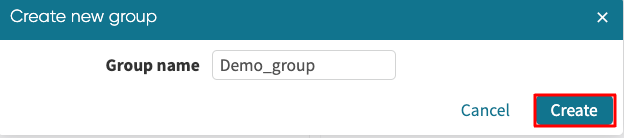
The group will be created.

Add a user to a group
To add users to a group, select the group. On the right-hand side, we can select the user(s) and click the “>” button to add the user(s) to the group.
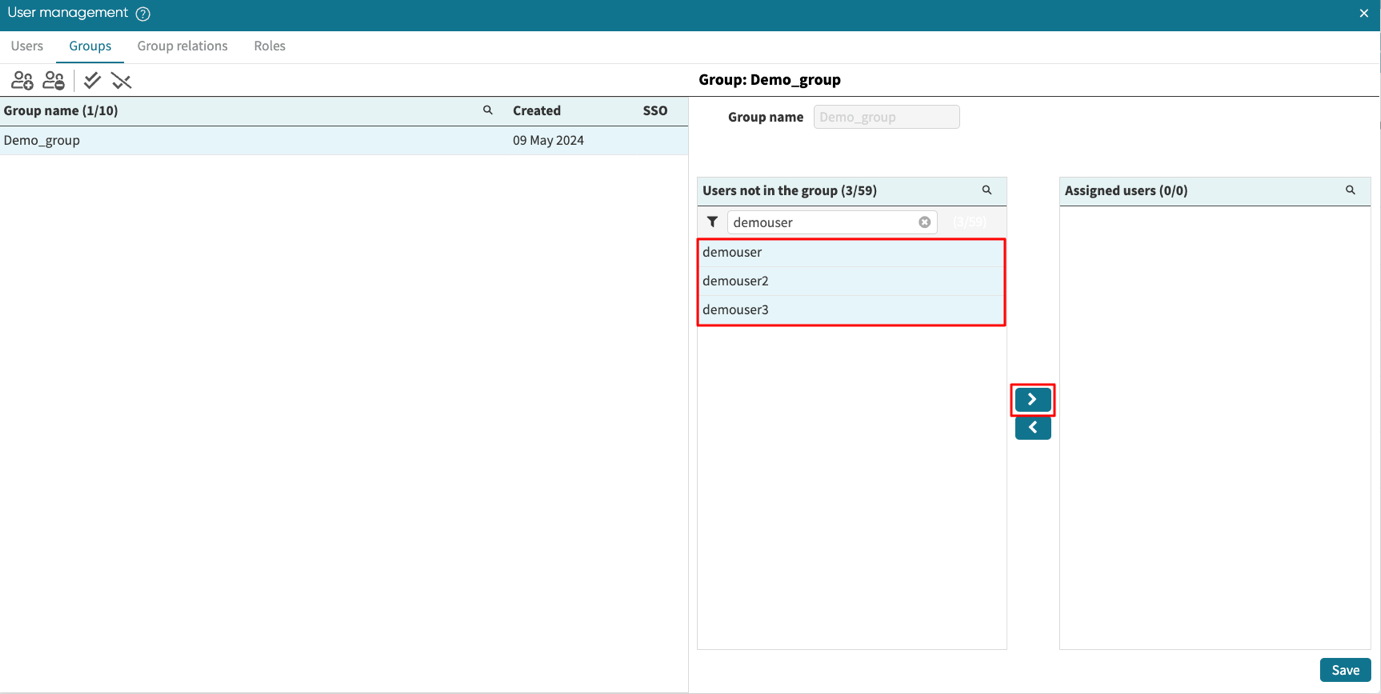
The user now appears in the Assigned users section.
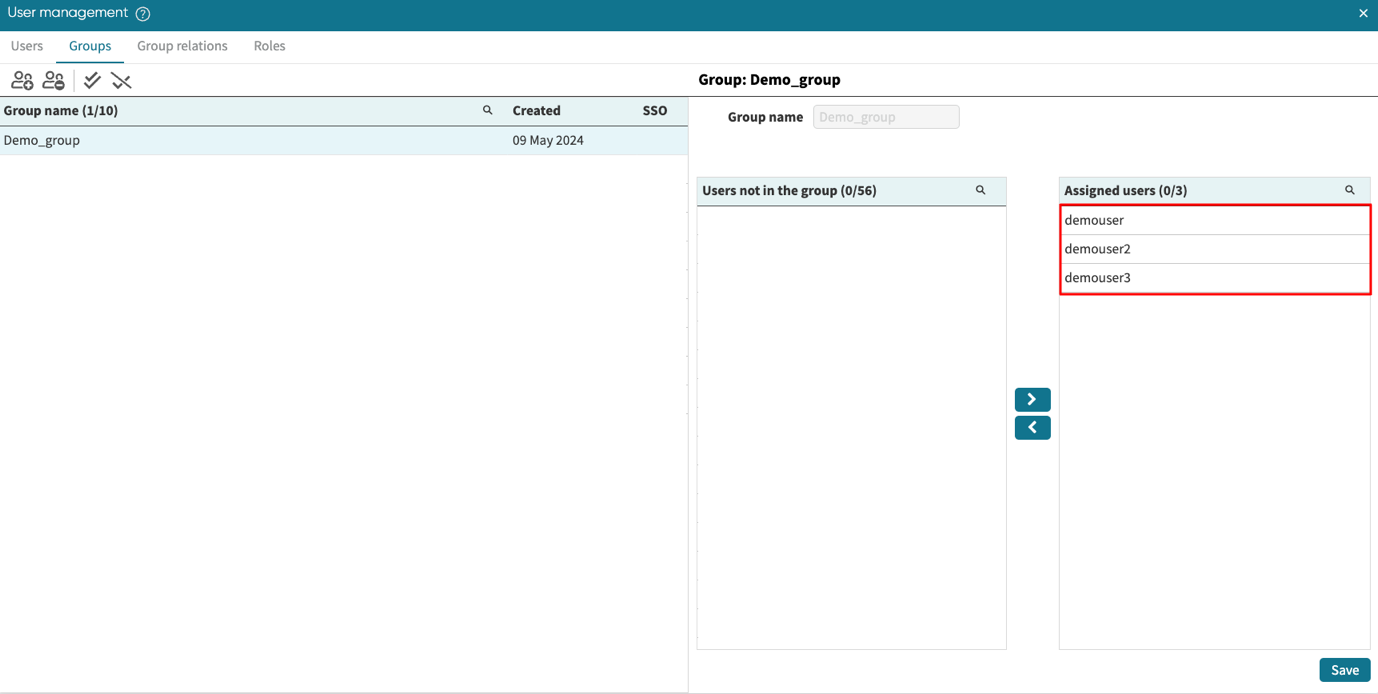
Click Save.
Remove a user from a group
To remove a user from the group, select the user in the Assigned Users section and click the “<” button.
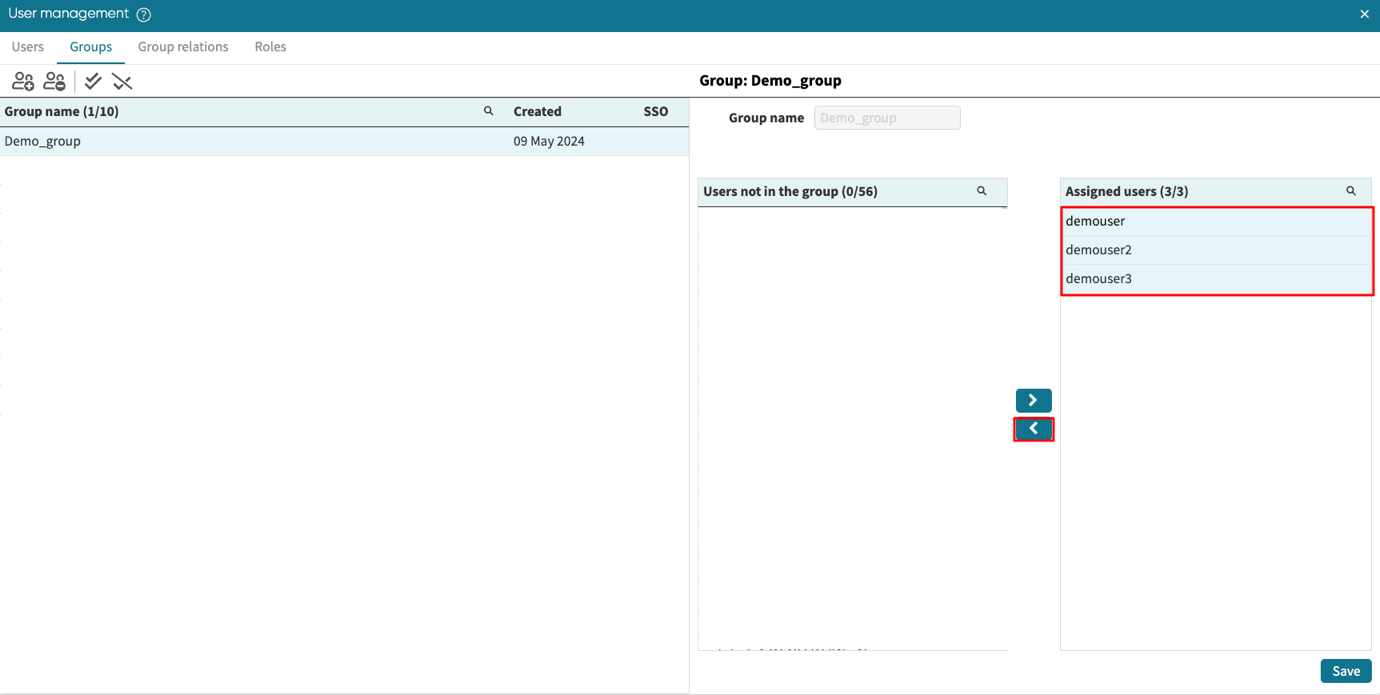
The user now appears in the Users not in the group section. Click Save.
Remove group
To remove a group, select the group and click on the Remove group button.
Create and remove group relations
The group relations tab defines the relationship between groups when publishing a model. To learn more about group relations for publishing a model, see Publish Process Model.
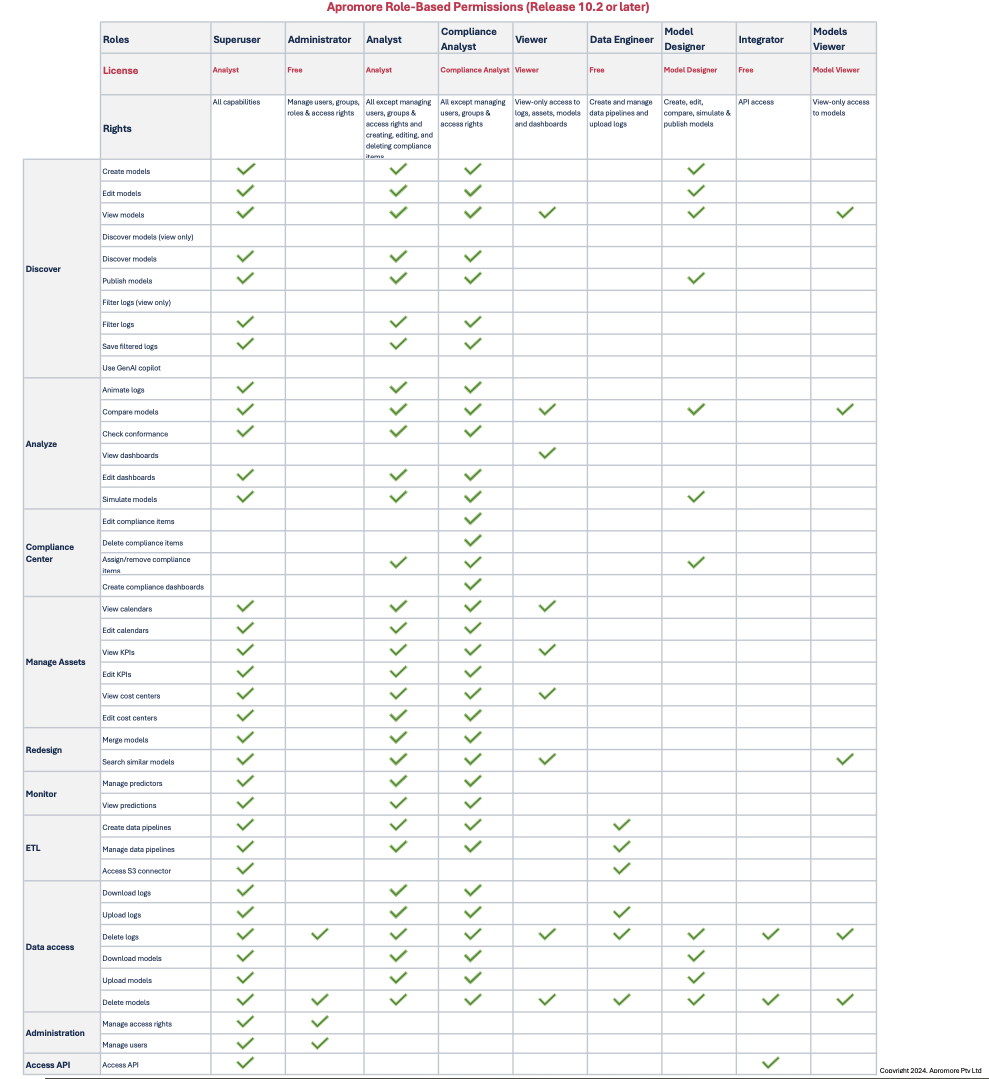
Roles and permissions
A role gives a certain set of application permissions. The following table lists the permissions available in Apromore and their meaning.
Permission |
Description |
|---|---|
Create models |
Create new process models in the Workspace. |
Edit models |
Edit existing models in the Workspace. |
View models |
View models in the Workspace. |
Discover models (view only) |
Discover model from a process map but cannot save the model. |
Discover models |
Discover and save model from a process map in Process Discoverer. |
Publish models |
Publish existing models. |
Filter logs (view only) |
Can view and apply existing filters but cannot create a new filter. |
Filter logs |
Create a new named filter. |
Save filtered logs |
Apply a filter to a log and save the resulting filtered log in the Workspace. |
Ask Apromore chatbot |
Use the Ask Apromore chatbot to perform process mining in Apromore. |
Animate logs |
Run a log animation in Process Discoverer or from the Workspace. |
Compare models |
Use the model comparison feature. |
Check conformance |
Use the conformance checking feature. |
View dashboards |
View dashboards associated with a log. |
Edit dashboards |
Edit an existing dashboard or manage dashboard templates. |
Simulate models |
Start a simulation using the process model editor or the Workspace. |
Edit compliance items |
Edit an existing risk, obligation, or control in the compliance center. |
Delete compliance items |
Delete an existing risk, obligation, or control in the compliance center. |
Assign/remove compliance items |
Assign/remove a compliance rule to/from a specific event log. |
Create compliance dashboards |
Create a dashboard block that utilizes the compliance center. |
View calendars |
View existing calendars in the Apromore Workspace. |
Edit calendars |
Edit existing calendars in the Apromore Workspace. |
View KPIs |
View existing KPIs that have been applied on a log. |
Edit KPIs |
Create and edit KPIs. |
View cost centers |
View the cost for each role in the cost center. |
Edit cost centers |
Edit the cost for each role in the cost center. |
Merge models |
Use the ‘Merge models’ feature in the Workspace. |
Search similar models |
Use the ‘Search similar models’ features in the Workspace. |
Manage predictors |
Create a new predictor or edit or remove existing predictors. |
View predictions |
View the generated predictions. |
Create data pipelines |
Open the data pipeline environment from the Workspace. |
Manage data pipelines |
Open the ‘Manage data pipelines’ window to view and edit existing pipelines. |
Access S3 connector |
Extract micro-batches from an Amazon S3 folder in the data pipeline environment. |
Download logs |
Download an event log from the Workspace. |
Upload logs |
Upload an event log to the Workspace. |
Delete logs |
Delete an event log in the Workspace. |
Download models |
Download a process model from the Workspace. |
Upload models |
Upload a process model to the Workspace. |
Delete models |
Delete a process model in the Workspace. |
Manage access rights |
Open the ‘Manage access rights’ window. Note that every user can manage access rights to the logs they own via the Share button. |
Manage users |
Create, edit, or remove users, groups, or roles. |
Access API |
Access the functionality of Apromore via its API. |
Note
If a “view only” permission is selected, its corresponding permission that allows editing or modifying will be automatically deselected.
Assign a role to a user
Every user has a role. The role of a user determines the operations the user is permitted to do in Apromore. For example, a user with an Analyst role can create and edit dashboards, whereas a user with a Viewer role cannot. Similarly, a user with the role of Analyst or Model Designer can create and edit process models, but a user with a Viewer role cannot.
The following matrix shows the permissions that each role has.
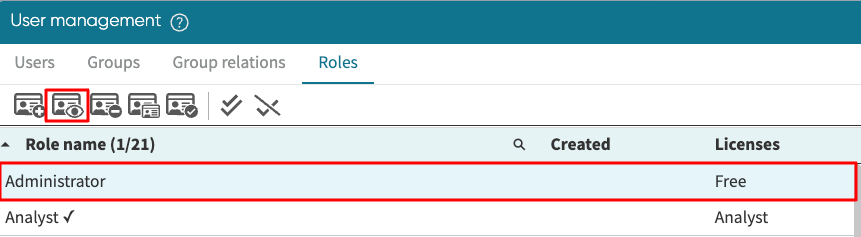
To assign the role to a user, go to the Roles tab.
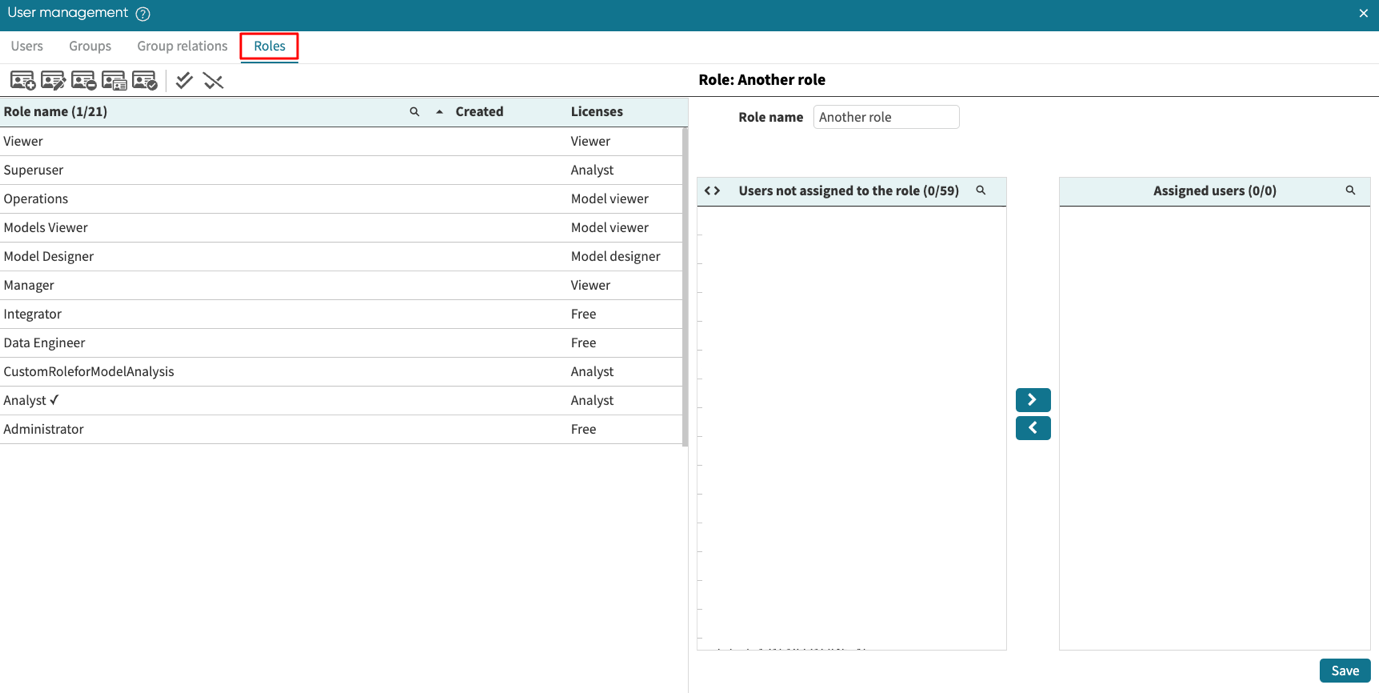
Choose a role from the Role name section and select the user from Users not assigned to the role list. Click on the “>” button and Save.
Note
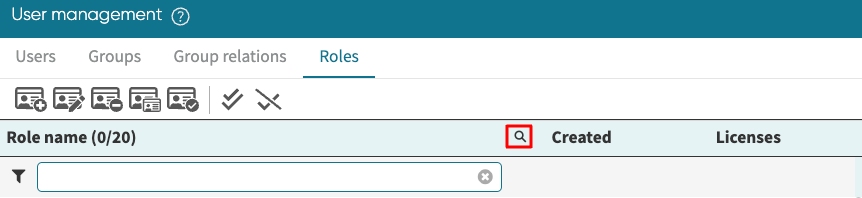
For larger organizations with many roles, the Search Role can ease the process. To search for the role, click on  and enter the role name in the field.
Note
The checkmark in front of Analyst indicates that a newly created user will automatically be assigned the Analyst role. We can change the user’s role using the steps in this section.
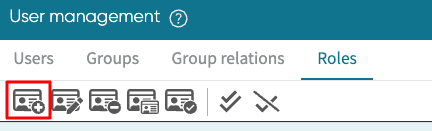
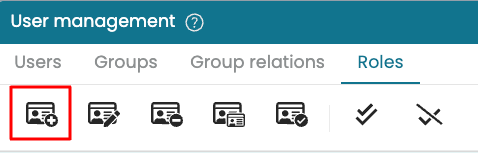
Create a new role
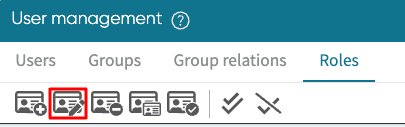
To create a new role, click the Create new role icon.
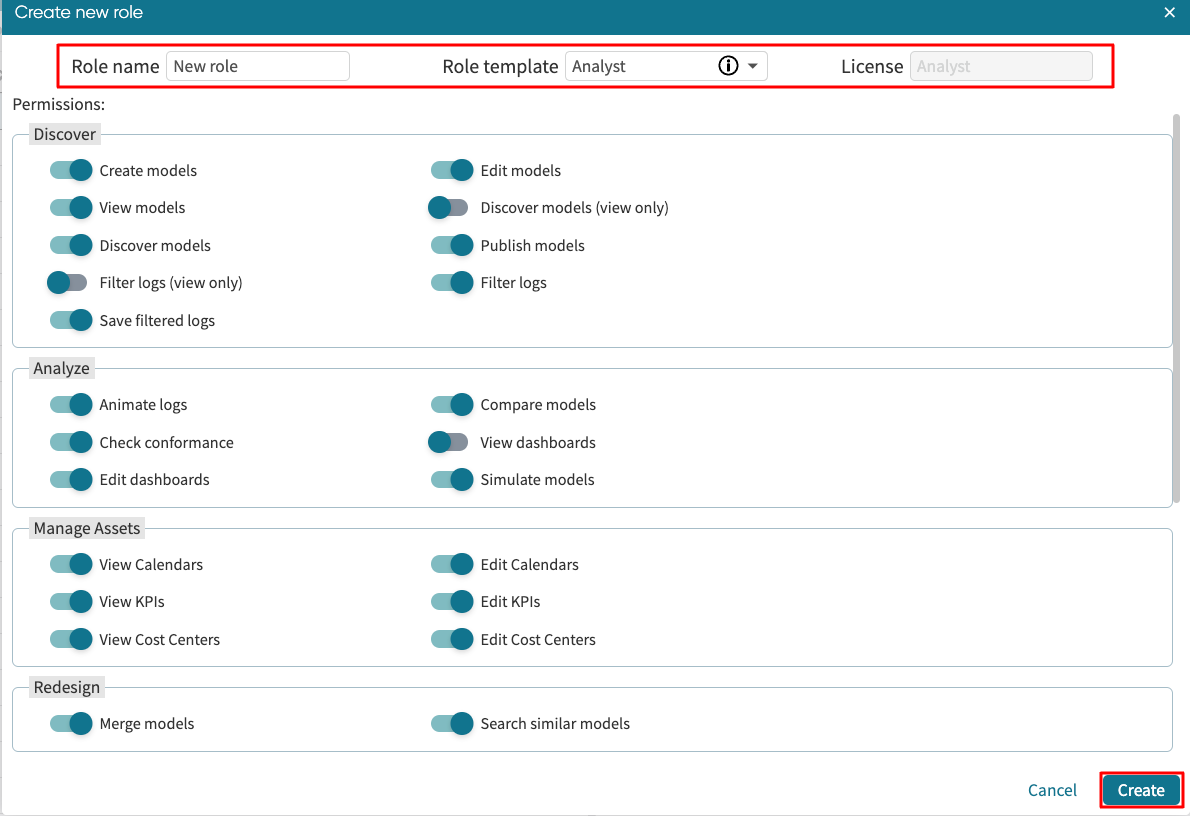
The Create new role window pops up. Enter the Role name, and select the Role template. Click Create.
Note
The role template determines the license type that would be assigned to the role. For more information about license types, see Manage licenses.
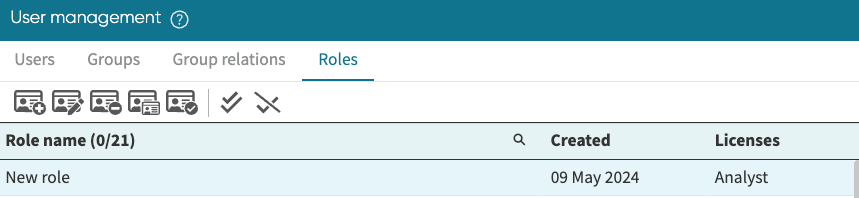
The new role will appear in the Role name list.
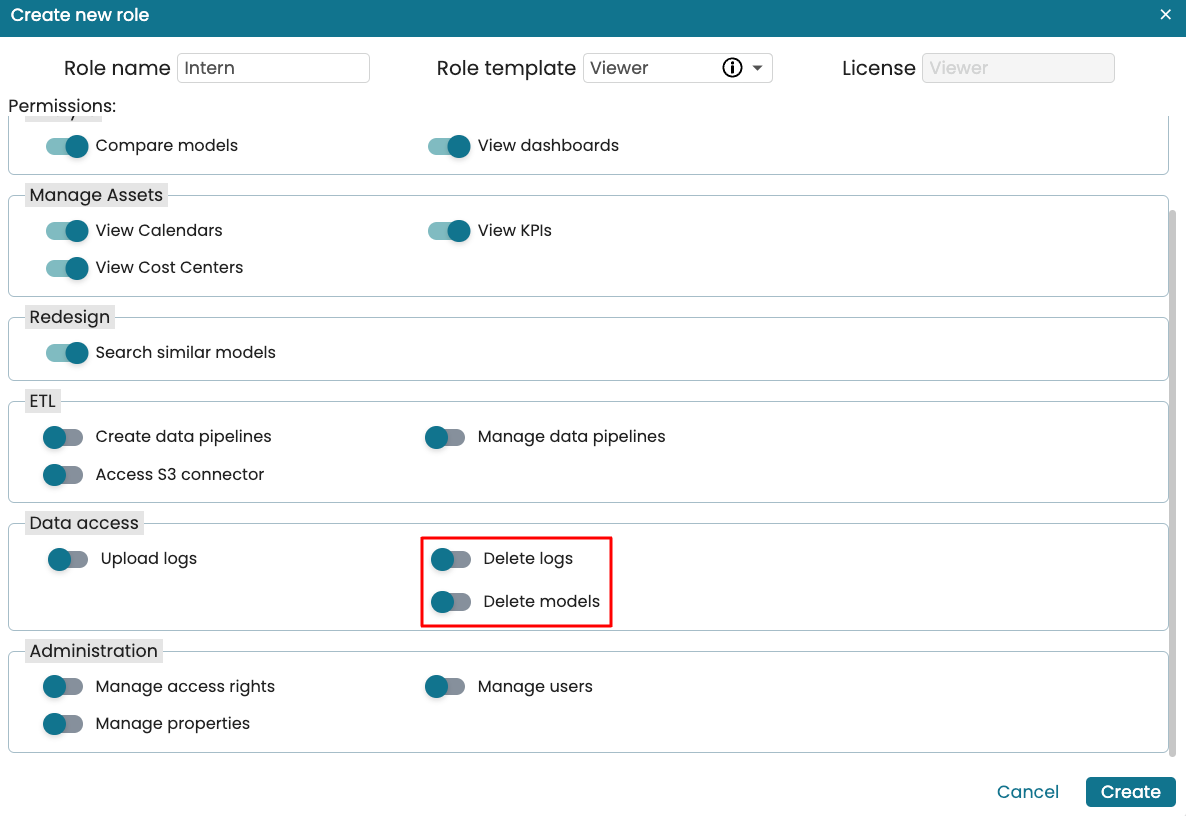
To enhance control over user interactions with logs and models, we can specify whether a role can delete a log or delete a model using the Delete logs and Delete models permissions respectively.
Delete logs: When disabled, the user cannot delete logs in their instance.
Delete model: When disabled, the user cannot delete models in their instance.
To demonstrate this, let us say we want an intern to view logs and models but not delete them. We can create a role that specifies this permission.
From Portal, click Settings > Manage users to open the user management window.
Go to the Roles tab and click the Create new role icon to create a new role.
Enter the name of the role and specify a Role template.
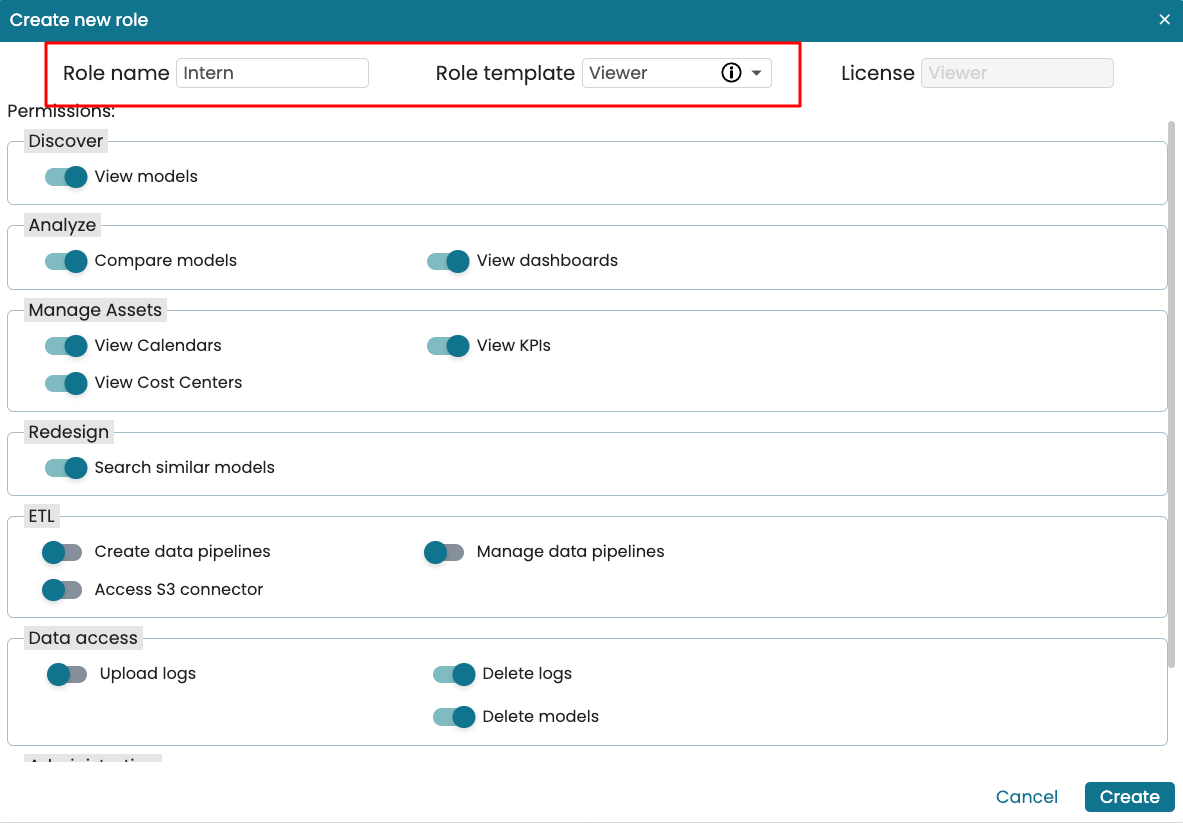
In Data access, we can toggle off Delete logs and Delete models.
Click Create to save this new role.
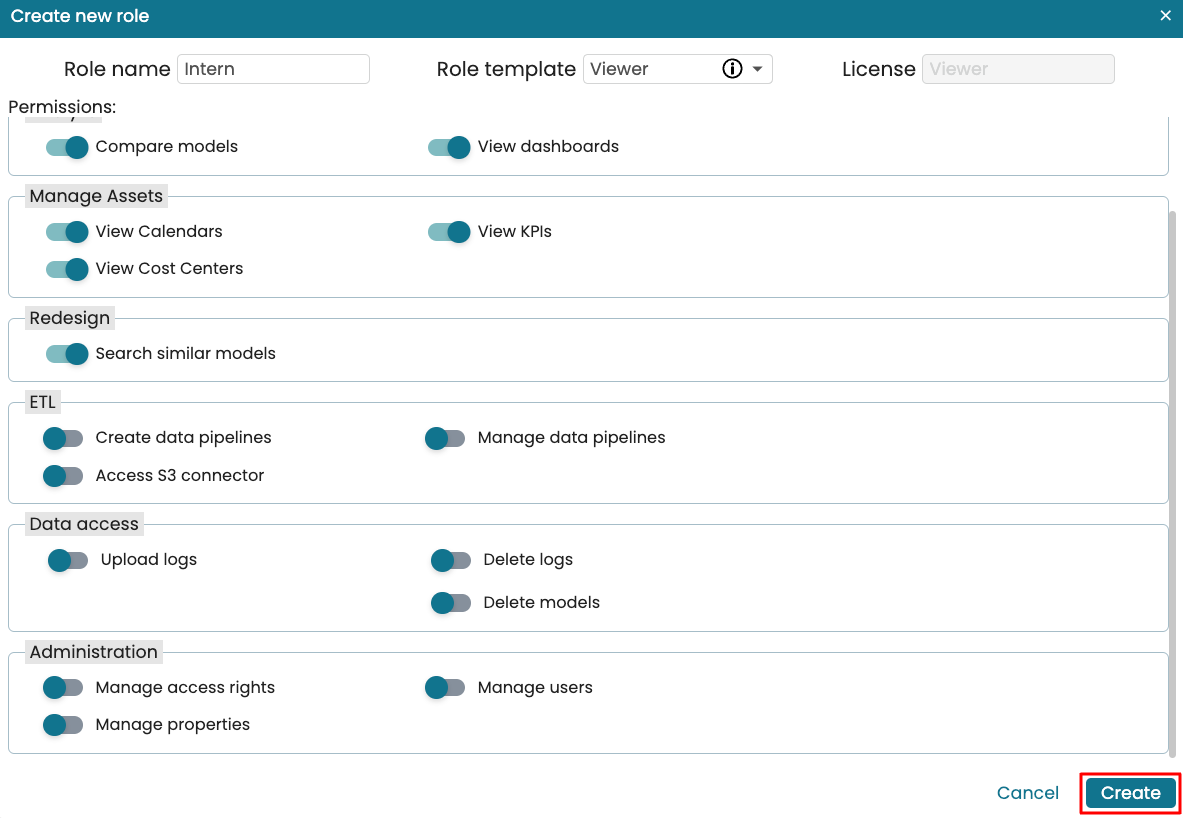
Now, when a user is assigned the Intern role, the delete icon will no longer appear when they select a log or model, effectively preventing them from deleting the log or model.
Note
If either the Delete logs or Delete models permission is disabled for a user, they will not be able to delete folders within their instance.
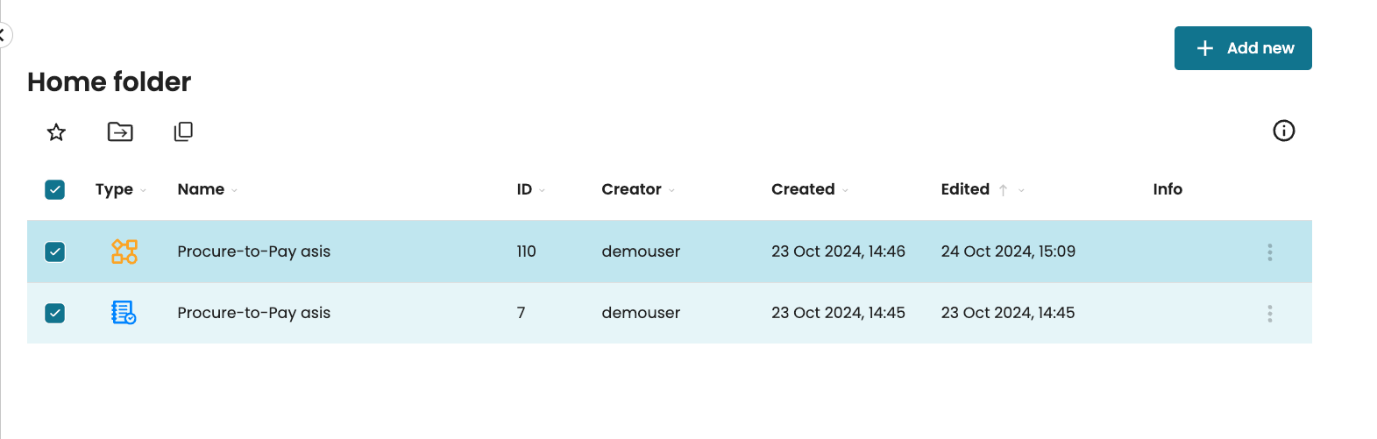
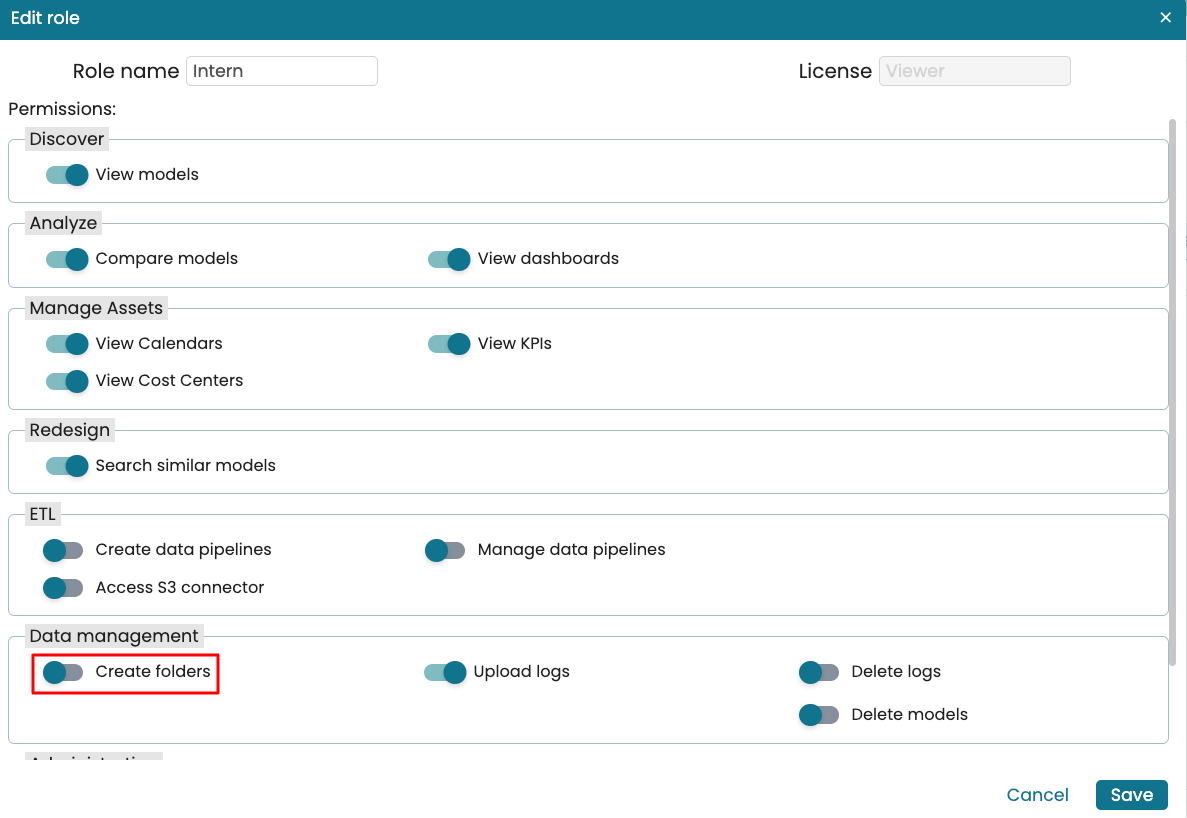
To provide granular control for folder creation, a permission called “Create folders” can be used to determines whether a user can create new folders in their Workspace.
The “Create folders” permission is added to all predefined licenses and is toggled on by default. If we wish to prevent some users from creating folders, we should toggle off this permission. Let’s say we have an existing role called “Intern” and we wish to prevent users assigned to this role from creating folders. To do so, click Settings > Manage users from the Portal to open the User management window, go to the Roles tab, select this role, and toggle off the Create folders permission in the Data management section.
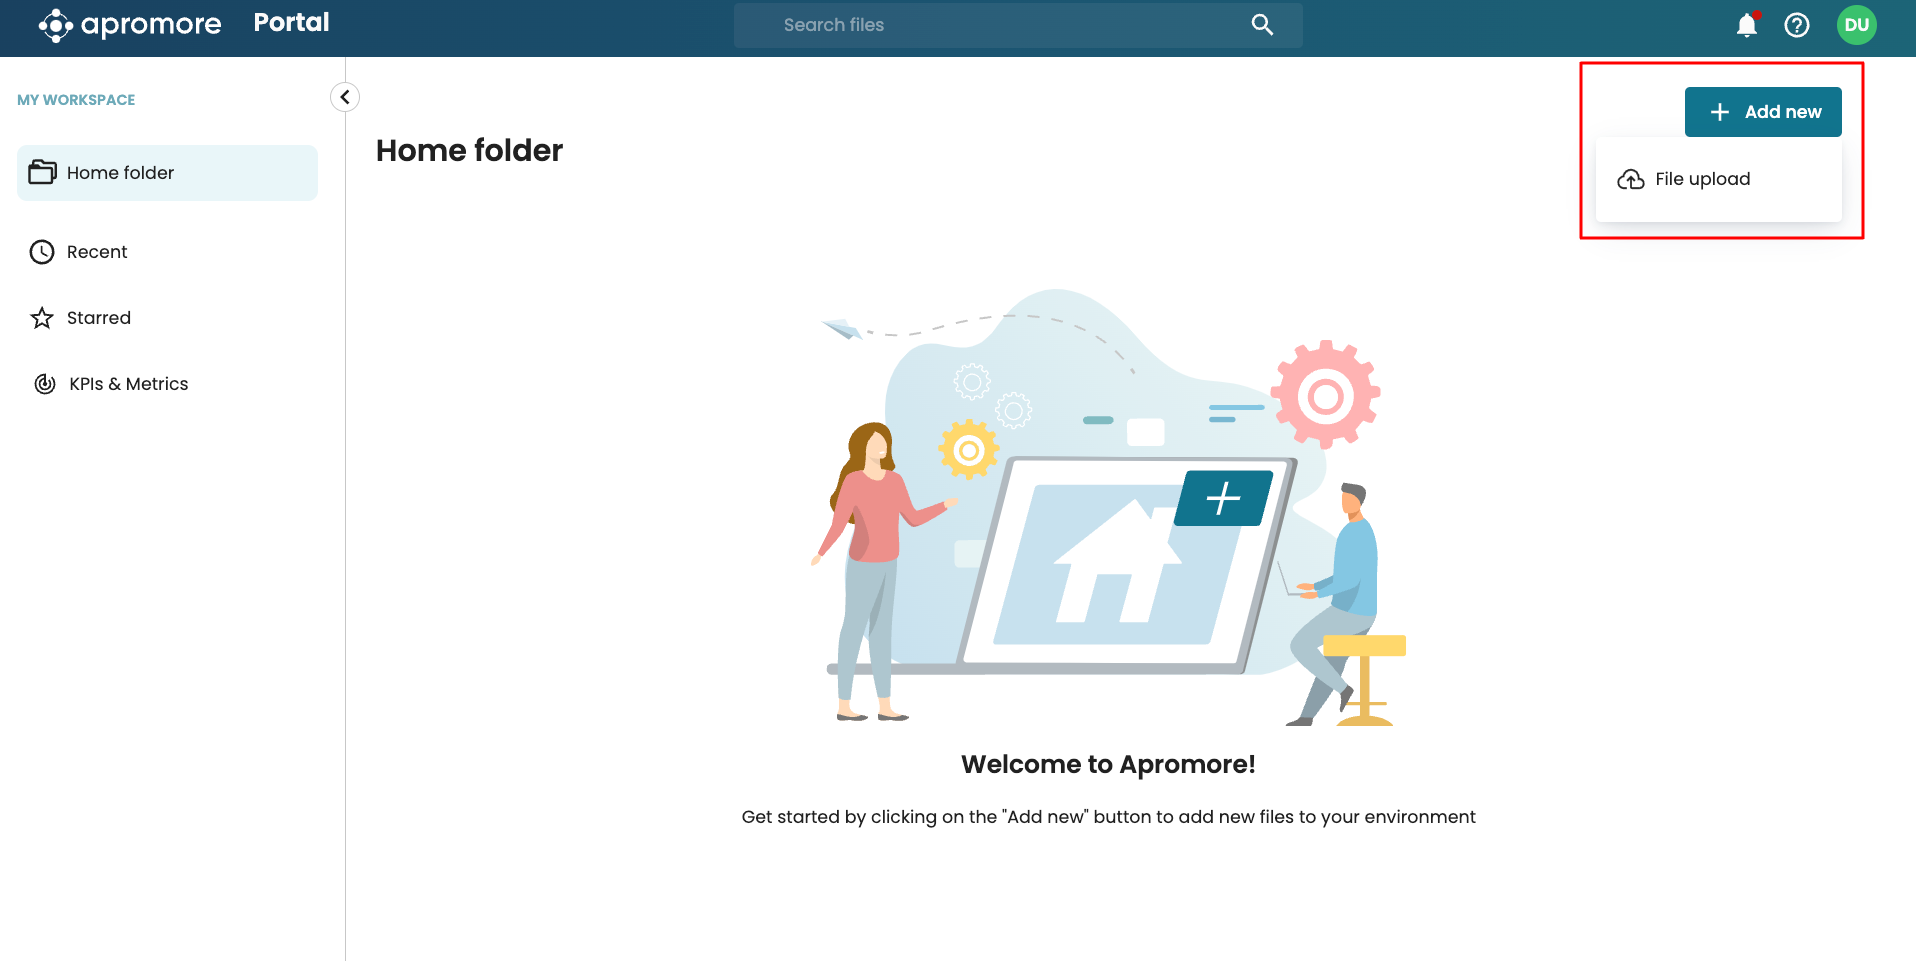
Users assigned to this role will not have the ability to create folders. When Add new is clicked in Portal, these users will not see the “Folder” option in the drop-down menu.
Edit a role
To change the role name or assigned permissions, select a role and click the Edit role icon.
The Edit role window pops up, and we can change the role name and permissions. After all the necessary changes are made, click on Save.
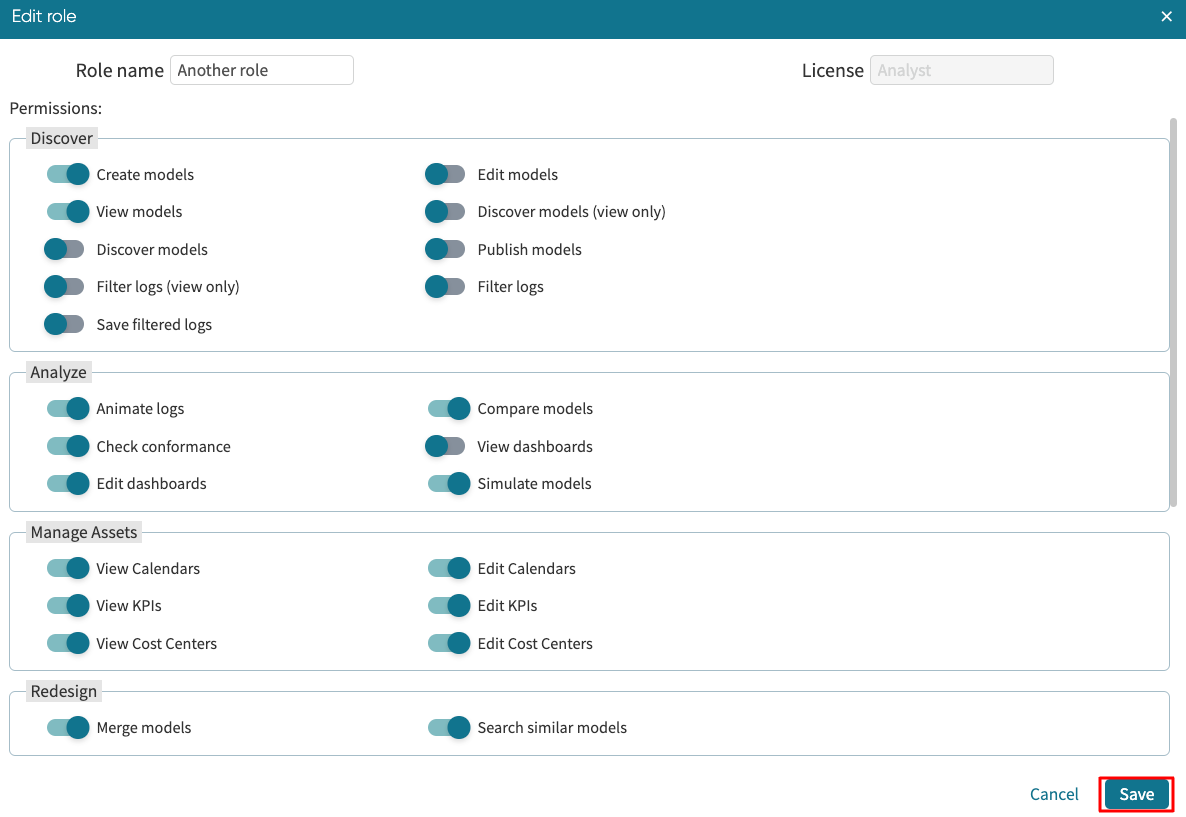
Note
The default roles cannot be edited.
When we select one of the default roles, the Edit role button changes to the View role. View roles allow seeing permissions assigned to each role.
Delete a role
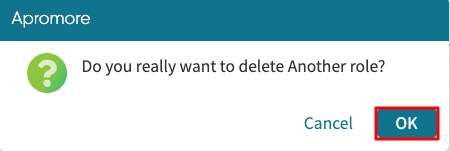
To delete a role, select the role and click the Remove role button.
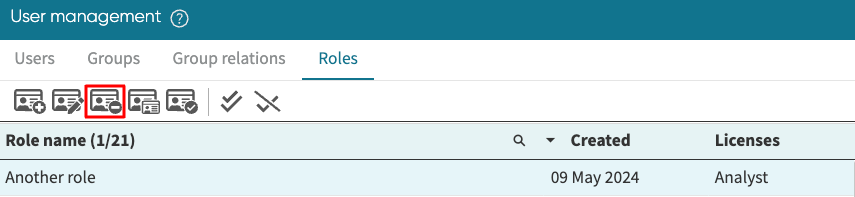
The confirmation window pops up. Click OK.
Clone a role
To copy-paste the role’s permissions, click the Clone role icon. It might be helpful when the new role is identical to an existing one, with only a few exceptions.