Upload a file
We can upload process models in BPMN and event logs in CSV, Parquet, XES, XLSX, zip, and gz formats.
We can do this through two options:
Upload Local File: The file is uploaded from our local computer.
Upload File from web or cloud: The file in cloud storage is uploaded to Apromore. We support files in Dropbox, Google Drive and Microsoft OneDrive.
Upload a process model
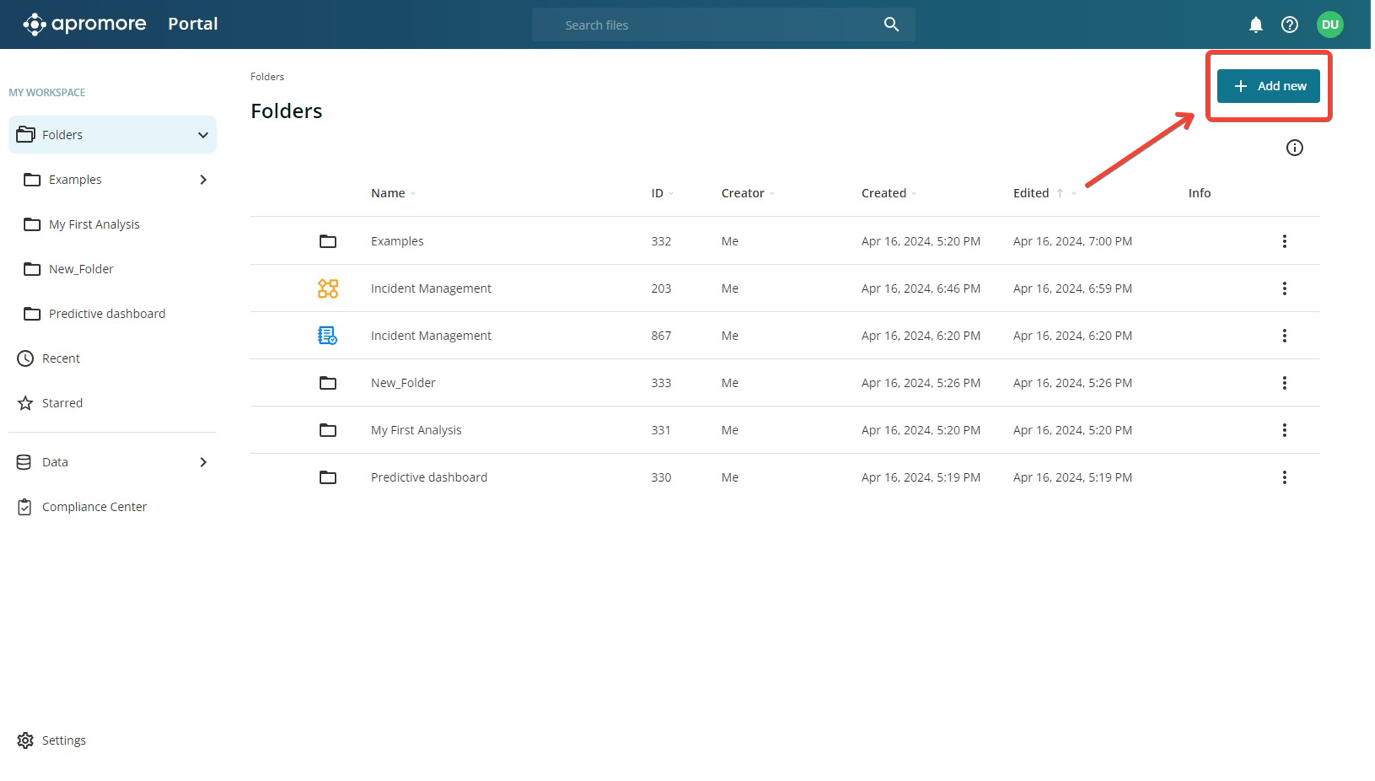
To upload a process model, click Add new.
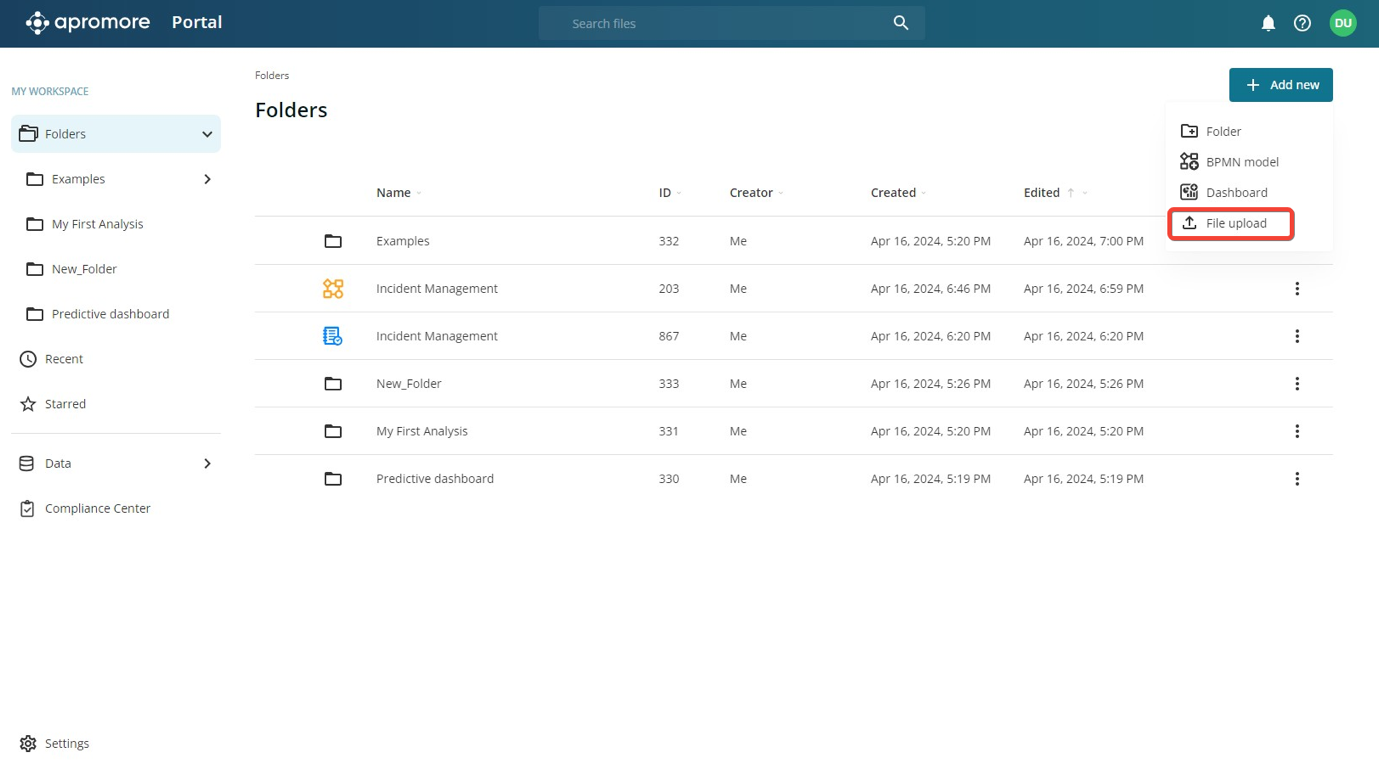
Click File upload.
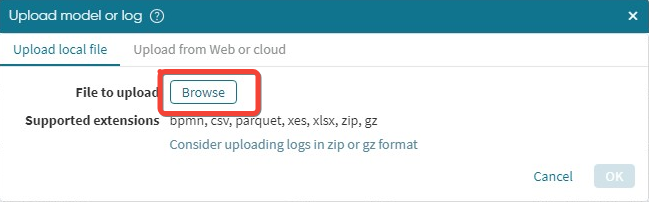
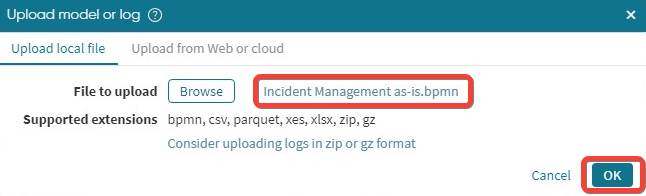
The Upload model or log window is displayed. To select the .bpmn file to upload, click Browse and select the file.
After selecting the file, the file name is displayed. Click OK to upload the file.
Note
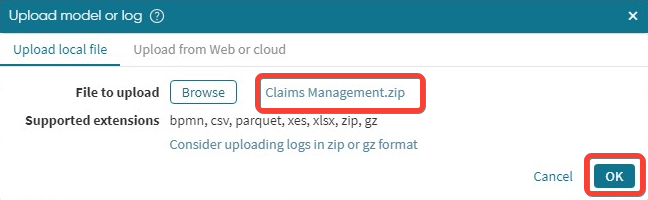
We can also upload a zip file containing multiple .bpmn models. When the zip file is selected, Apromore extracts all the .bpmn in the folder.
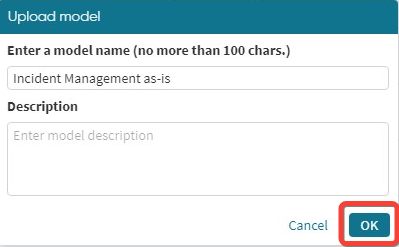
We will be prompted to name the BPMN model and optionally add a description.
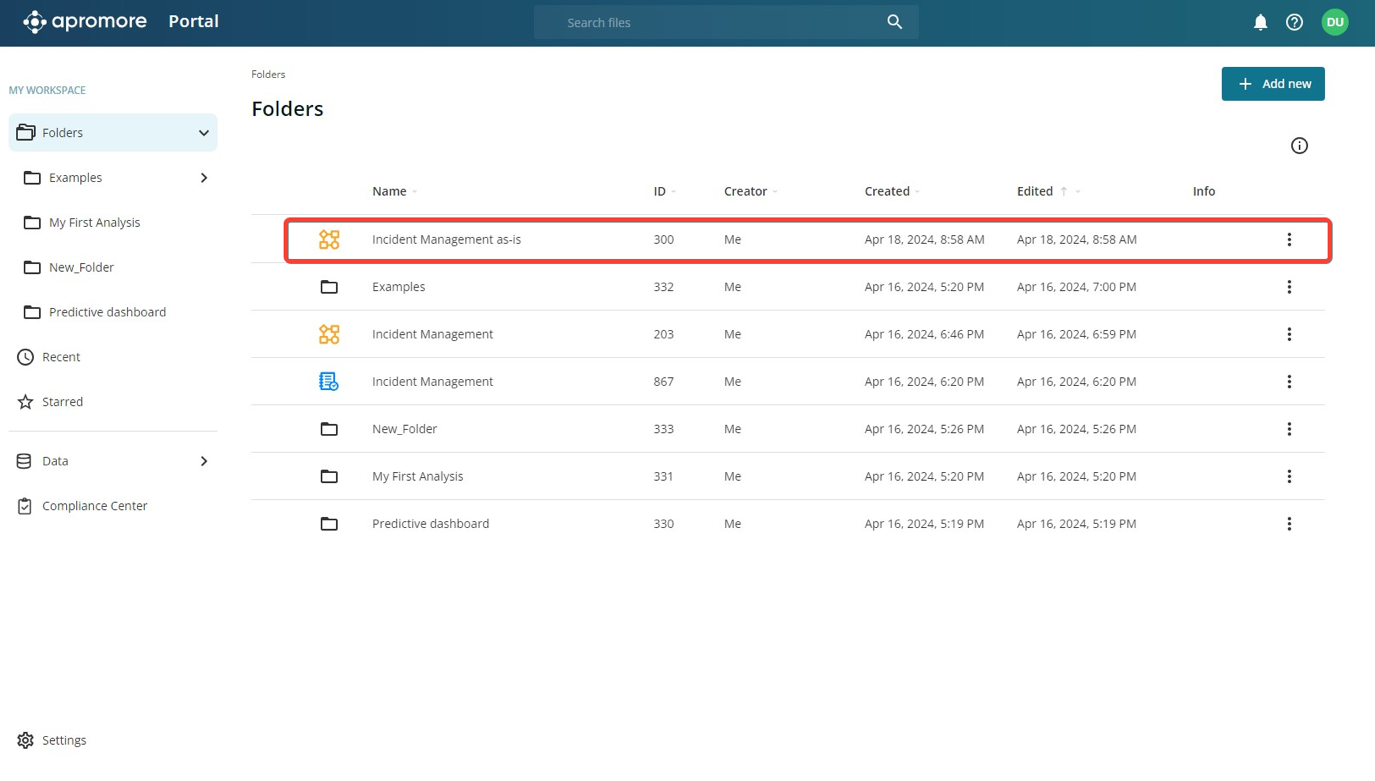
The file is successfully uploaded in the file location in where we have uploaded the file.
Upload an event log
The Apromore Portal allows us to upload event logs in csv, parquet, XES, and XLSX file formats. Event logs can also be uploaded in a compressed format (zip or gz).
Note
For event logs in CSV formats Apromore supports the following delimiters: tab, semicolon, comma, and spaces. We however recommend using the comma delimiter.
When uploading excel (XLSX) files, the file must contain one single sheet. Excel worksheets with multiple sheets are not supported.
Tip
To upload a file expeditiously, we recommend uploading a file in a compressed format.
To begin uploading the log, click Add new.
Click File upload.
The Upload model or log window is displayed. To select the event log file to upload, click Browse and select the file.
After selecting the file, the file name is displayed. Click OK to upload the file.
Files in XES format are imported directly, as they already contain all the metadata required by Apromore. However, when uploading event logs in csv, parquet and XLSX format, we need to provide schema information before importing them into the Apromore workspace.
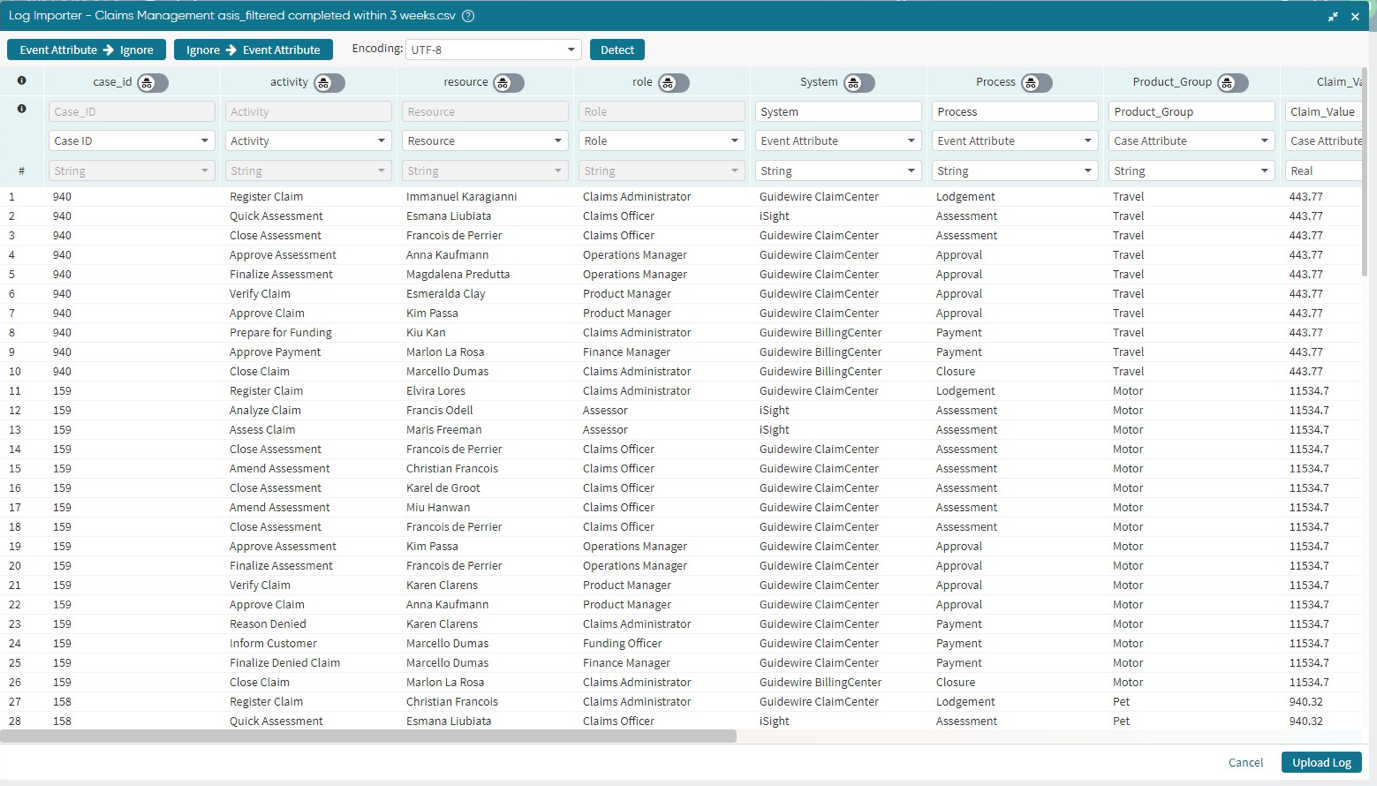
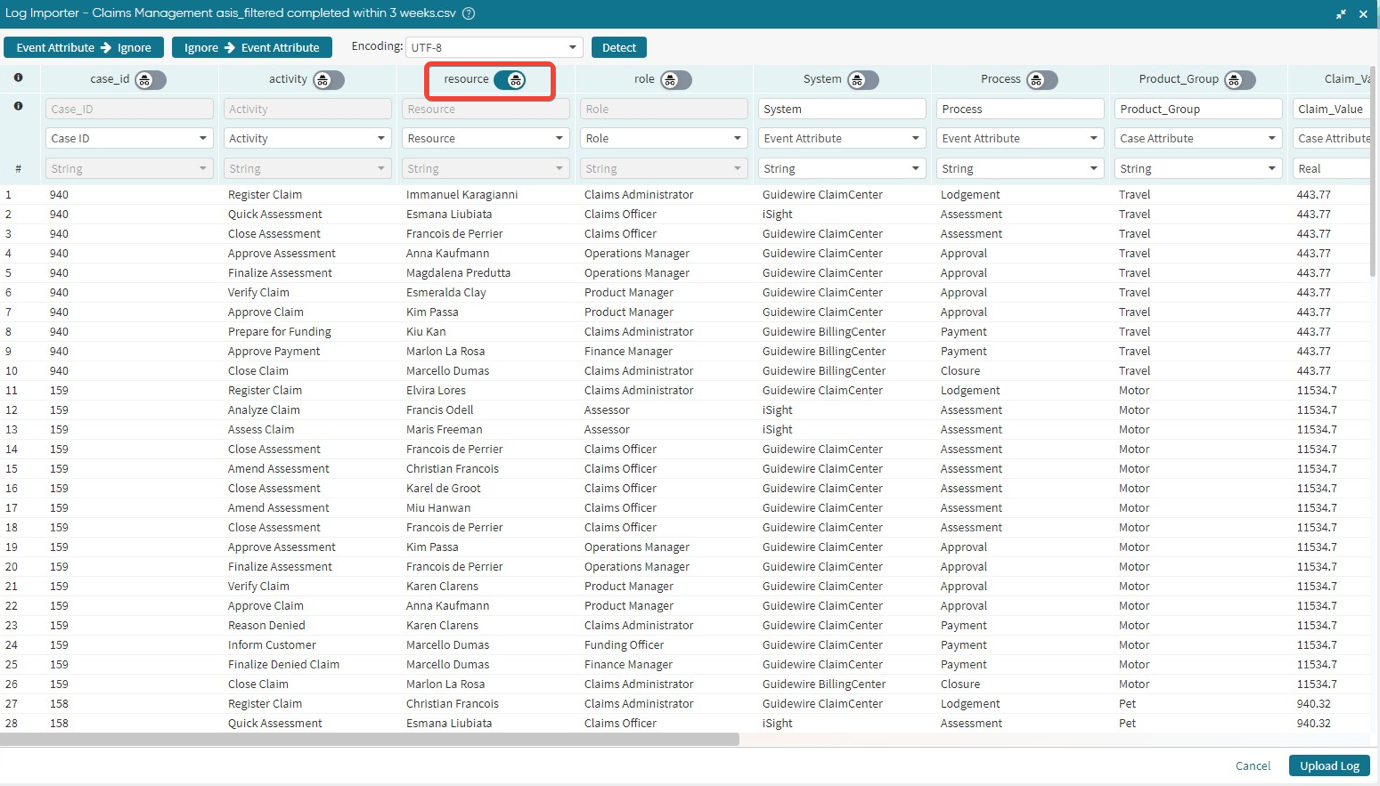
When not importing an XES file format, the Log importer window opens, displaying the data in the event log file.
In this window, we can tag each column in the CSV file with one of the following column types: case identifier, activity, start timestamp, end timestamp, other timestamps, resource, role, case attribute, or event attribute. We can also ignore a column so the column information does not appear in Apromore.
To successfully upload an event log in CSV in Apromore, we must specify which column corresponds to the case identifier, the activity, and the end timestamp. These three columns are mandatory.
Note
Apromore does not support timestamps earlier than 1 January 1900.
We may also tag other columns as a resource, role, case, and event attributes.
Note
We can assign only only column to a resource and role. However, we can have multiple case attributes and event attributes.
A case attribute is a column whose value is the same for every event of a case. For example, an attribute “Channel” with values “Email”, “Manual” and “Online”, is likely to be a case attribute since a case with Email channel does not change during the execution of the case.
An event attribute is an attribute that changes during the execution of a case, e.g. the “Activity Cost” is likely to change: at the beginning, it has an empty value and then it gets a value in the middle of the execution of a case.
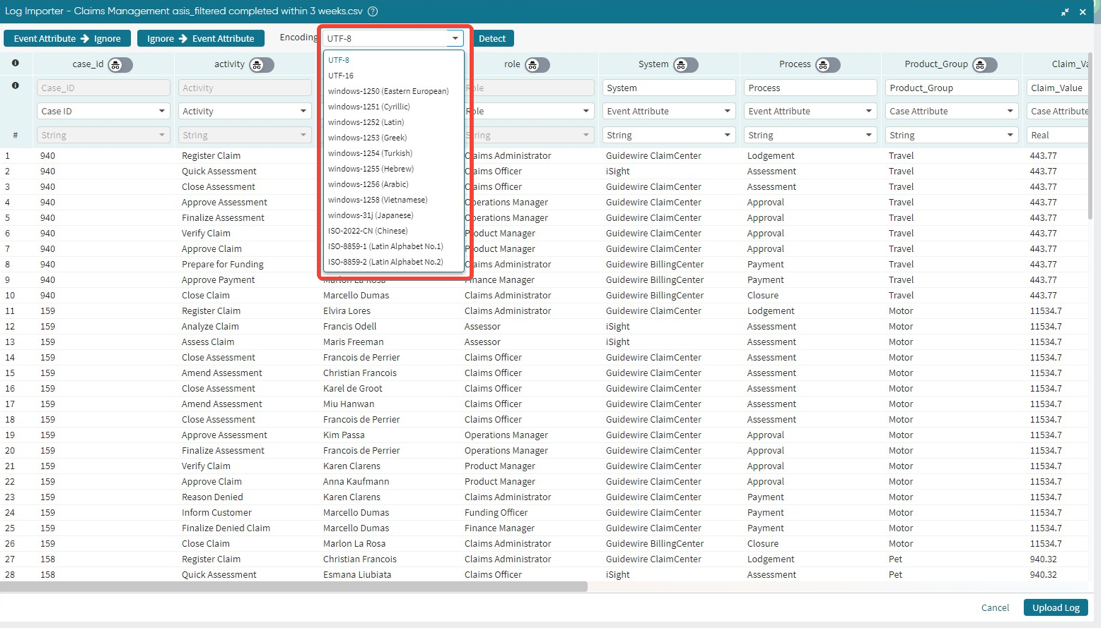
Additionally, the log importer supports a wide range of encoding options. We can change the encoding by merely clicking on the Encoding drop-down menu.
Note
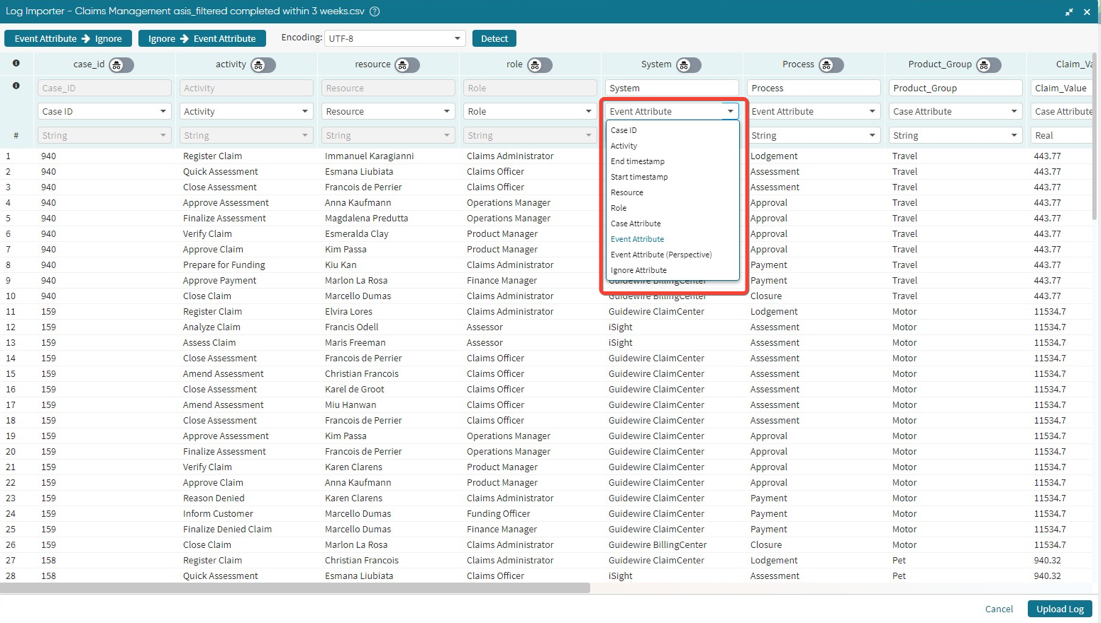
The Log importer attempts to automatically tag the columns corresponding to the case identifier and activity. It is important, however, to check that the columns have been tagged correctly.
We can manually alter the column attribute by clicking the drop-down menu as shown below and choosing the desired attribute.
We can also edit the name of a column. Let’s assume we want to change the “Channel” column to “Source”. To do this, click on the column name, enter the new column name and press Enter.
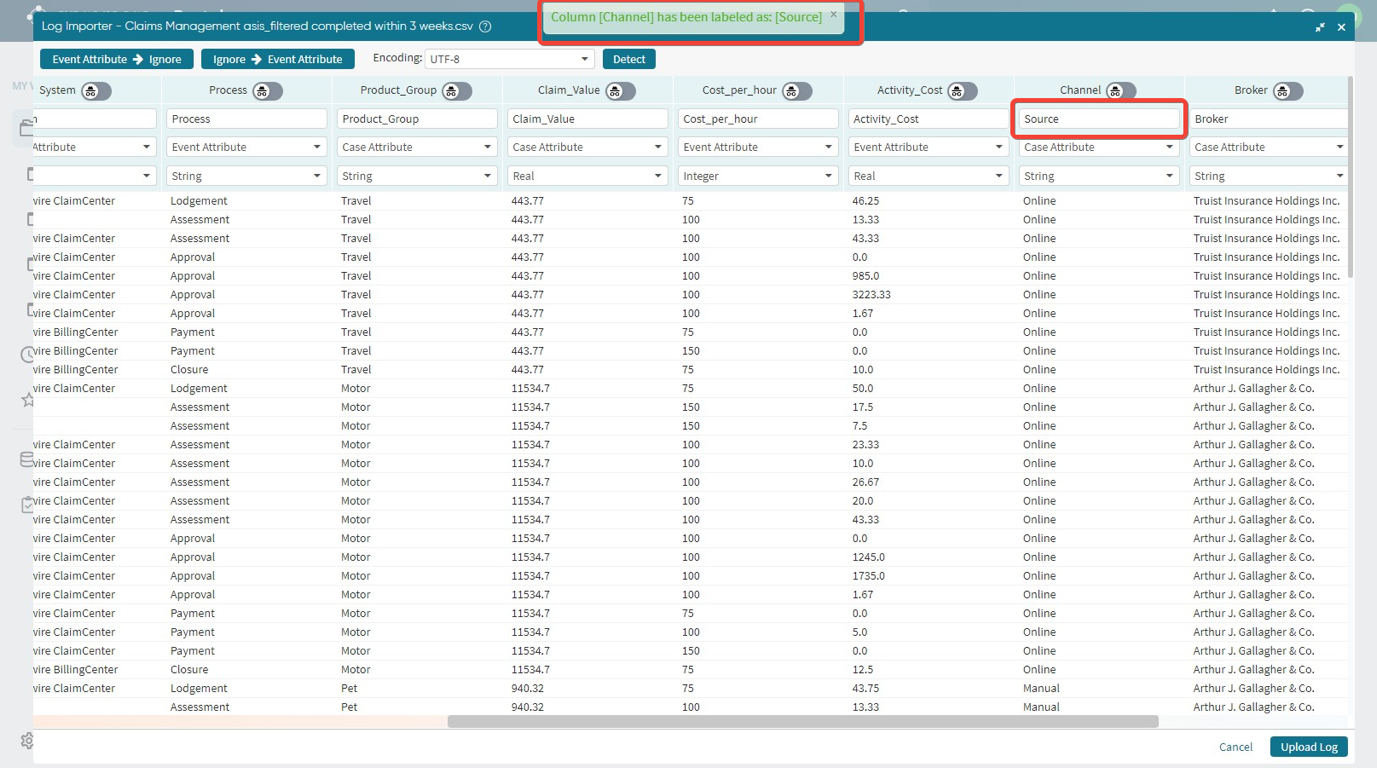
A confirmation pop up appears.
Note
We cannot change the name of the Activity, Start Time, End Time, Resource and Role columns.
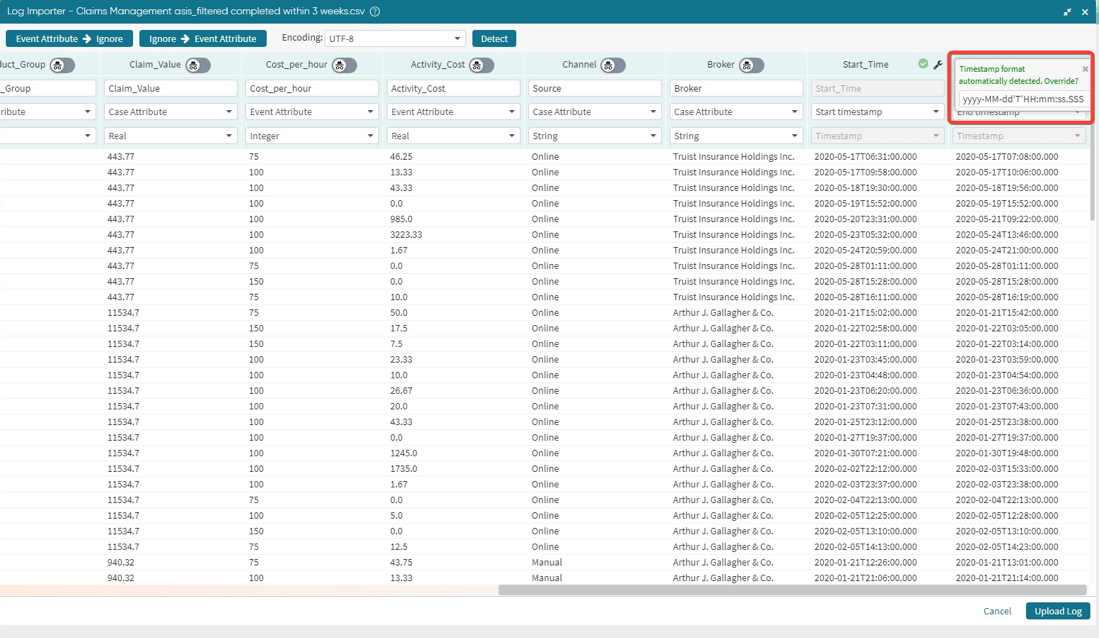
When a column is tagged as a timestamp, Apromore automatically detects the timestamp format.
We can however change the detected timestamp format.
To change this timestamp format, click on the Specify timestamp format  icon.
icon.
We can opt not to import a column by tagging it with the Ignore tag.
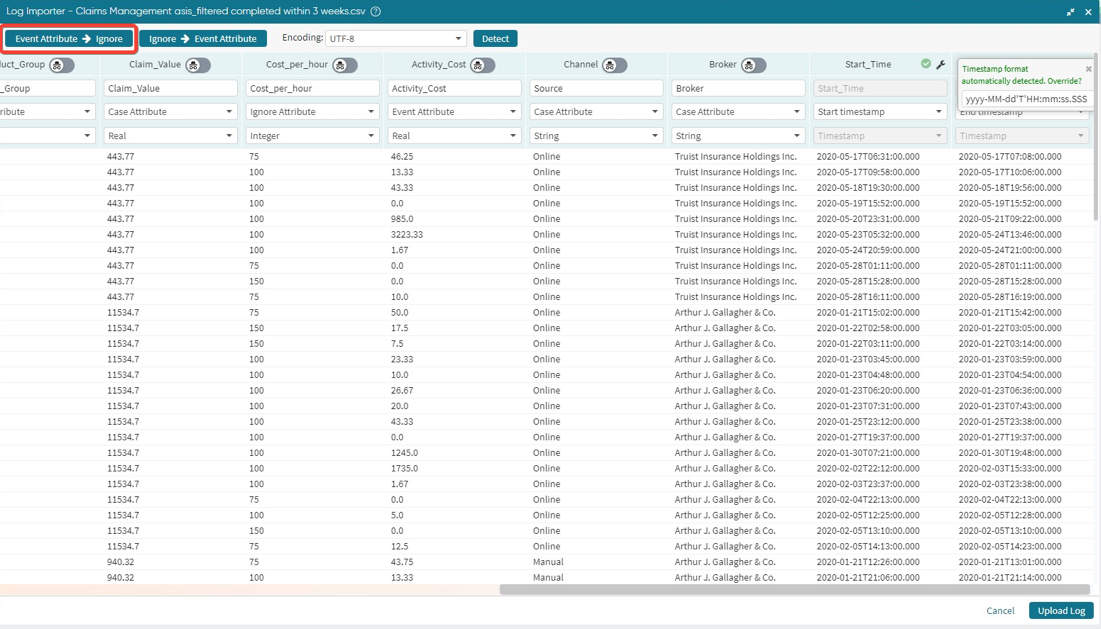
If we want to ignore all event attributes, we can click Event attribute -> Ignore at the top-left corner. When clicked, column tagged as event attributes will be tagged with Ignore.
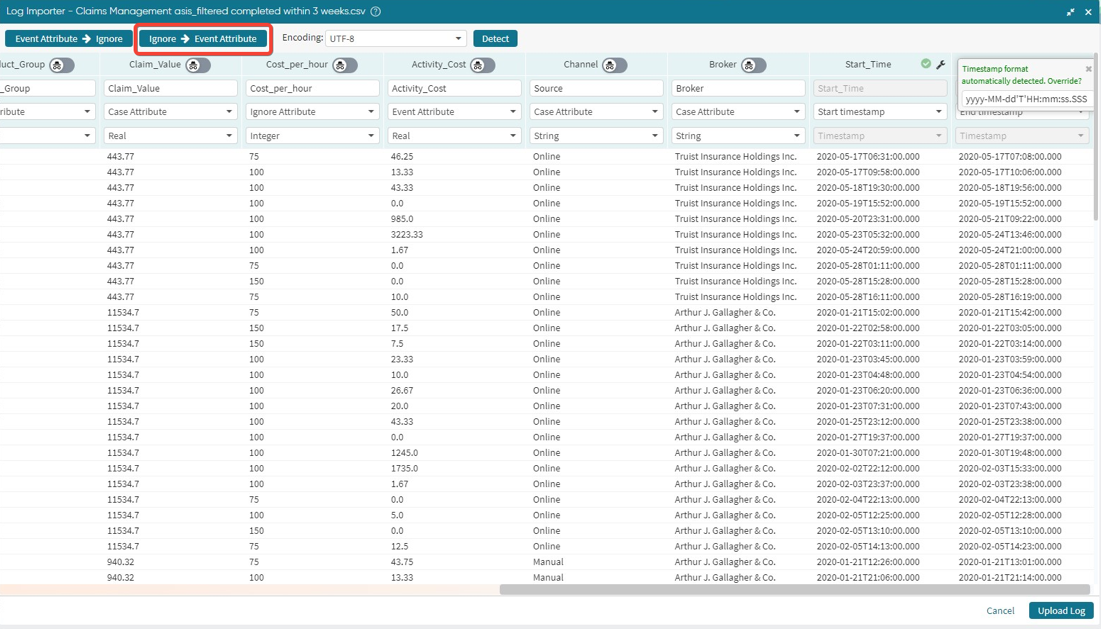
Similarly, if we need to return all columns tagged as Ignore to Event attribute, we can click Ignore –> Event Attribute in the top-left corner. When clicked, columns that were ignored will be tagged as Event Attribute.
Start times estimation
If the event log does not have end times, Apromore provides the option of estimating the start times of every activity in an event log, given the end times. This is useful in analyzing waiting times and processing times in a business process.
To calculate the start times from the end times, check the Discover start timestamp tickbox
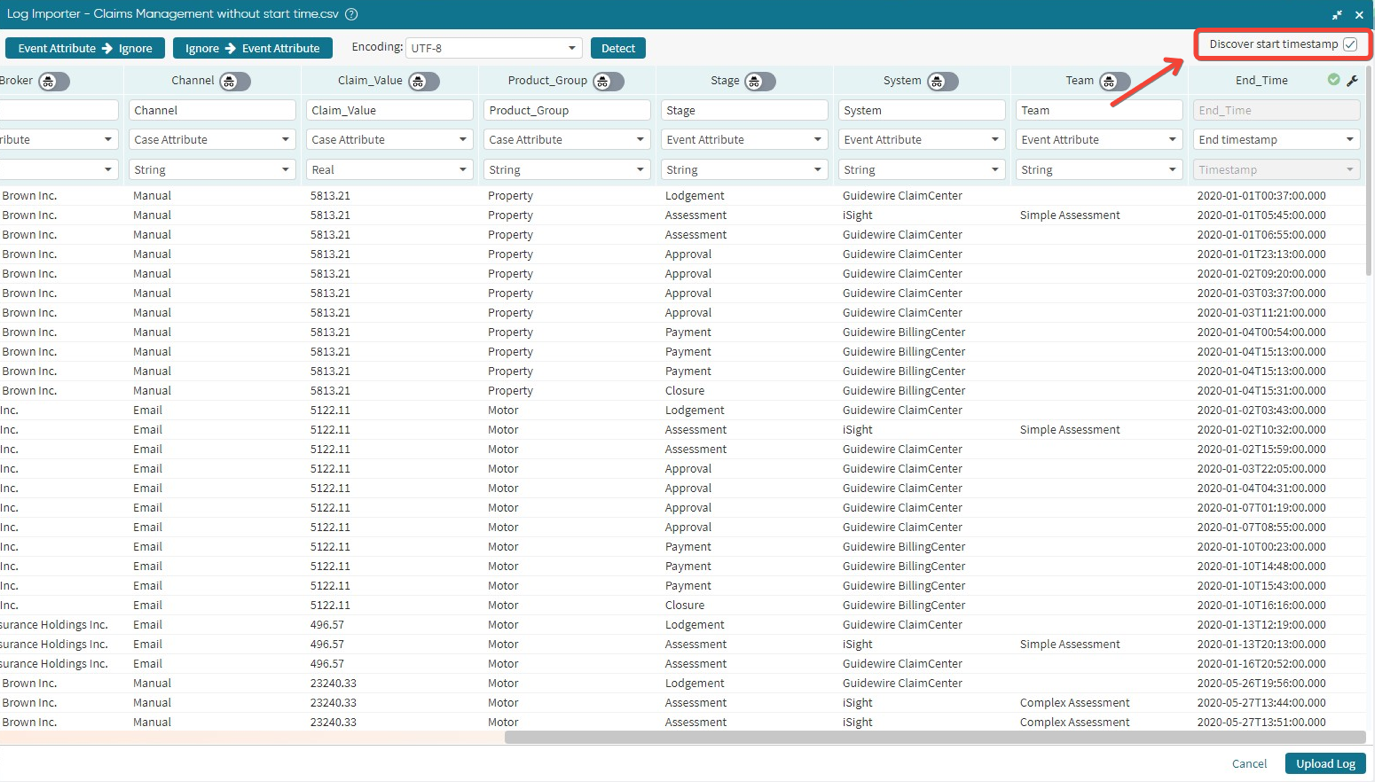
The imported event log will have a start time column.
Note
To estimate the start times, the event log must have a Resource column.
Apromore will estimate the start time of each activity instance A as follows:
It finds the end time of the preceding activity instance in the same case. This is called the enablement time of the activity instance.
It finds the time when the resource who performed activity A completed its most recent activity. This tells us the time when the resource became available. This is called the resource availability time.
Given the above, the start time of an activity instance is the maximum of the enablement time and the resource availability time.
Note
The technique used to estimate start times is not suitable when:
Many of the resources in the process only appear sporadically, for example, if some resources only perform a handful of activity instances. In this case, the resource availability times of these resources will be misleading.
The resources perform multiple activity instances simultaneously (multi-tasking). Again, this would result in a misestimation of the resource availability times.
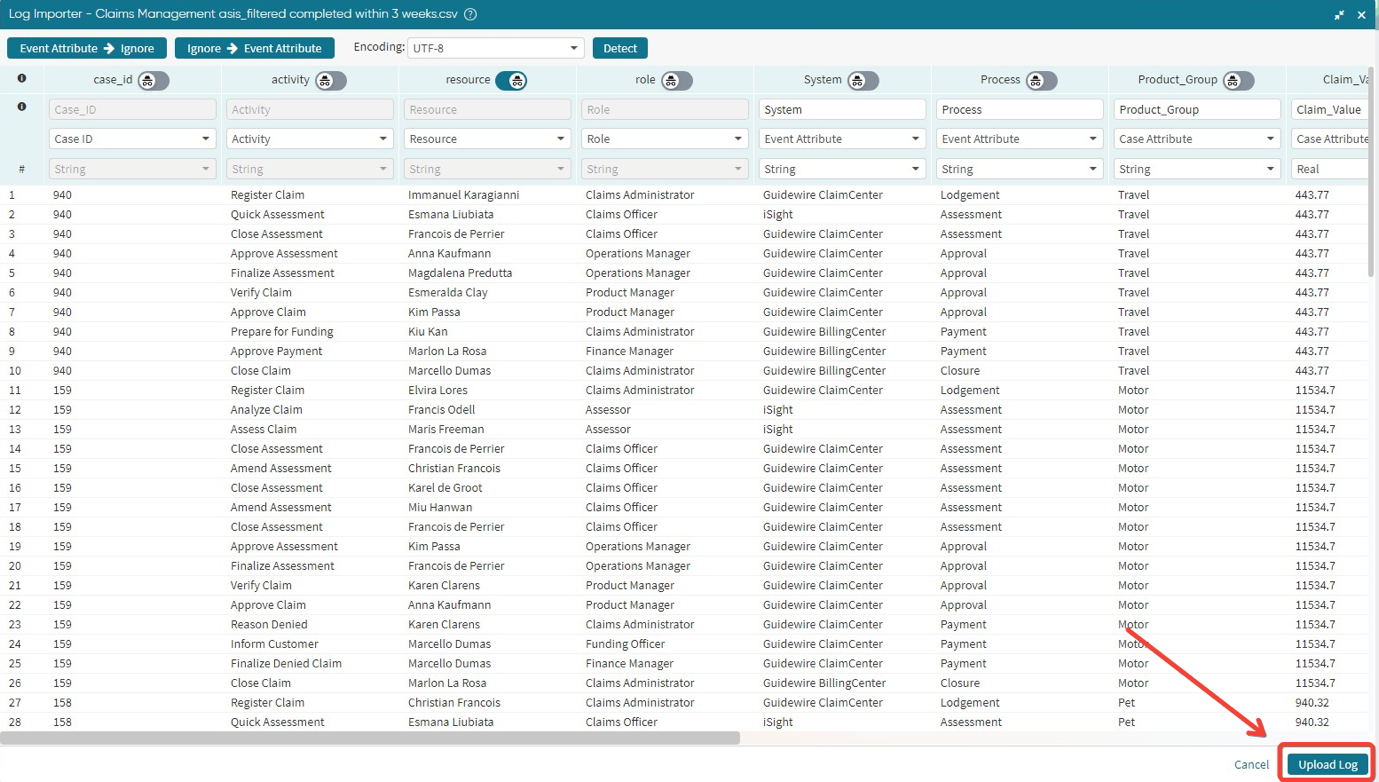
Click on Upload log to finish the log import.
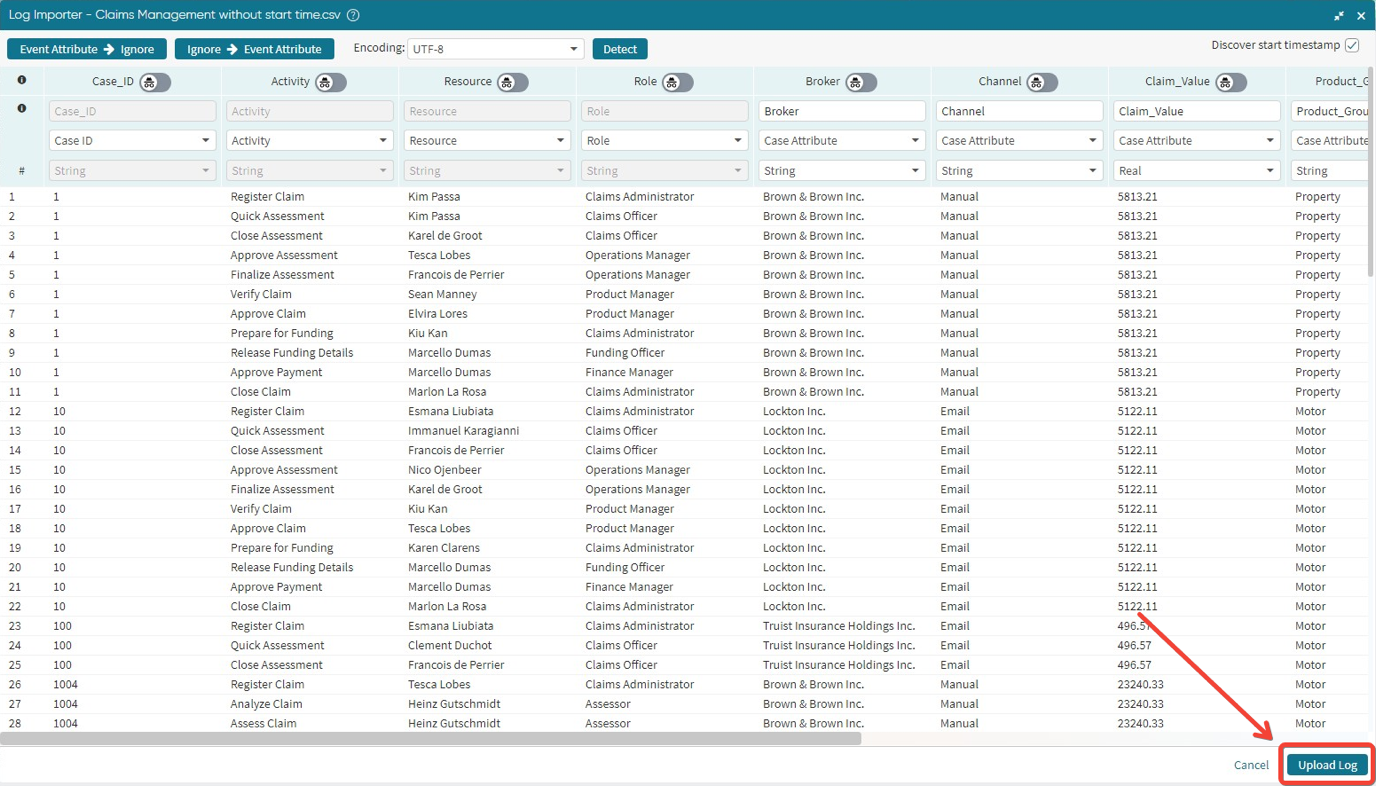
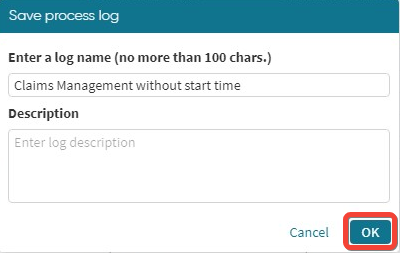
A dialog box will appear with a message prompting us to enter the log name and optionally a description. Click OK to complete the import.
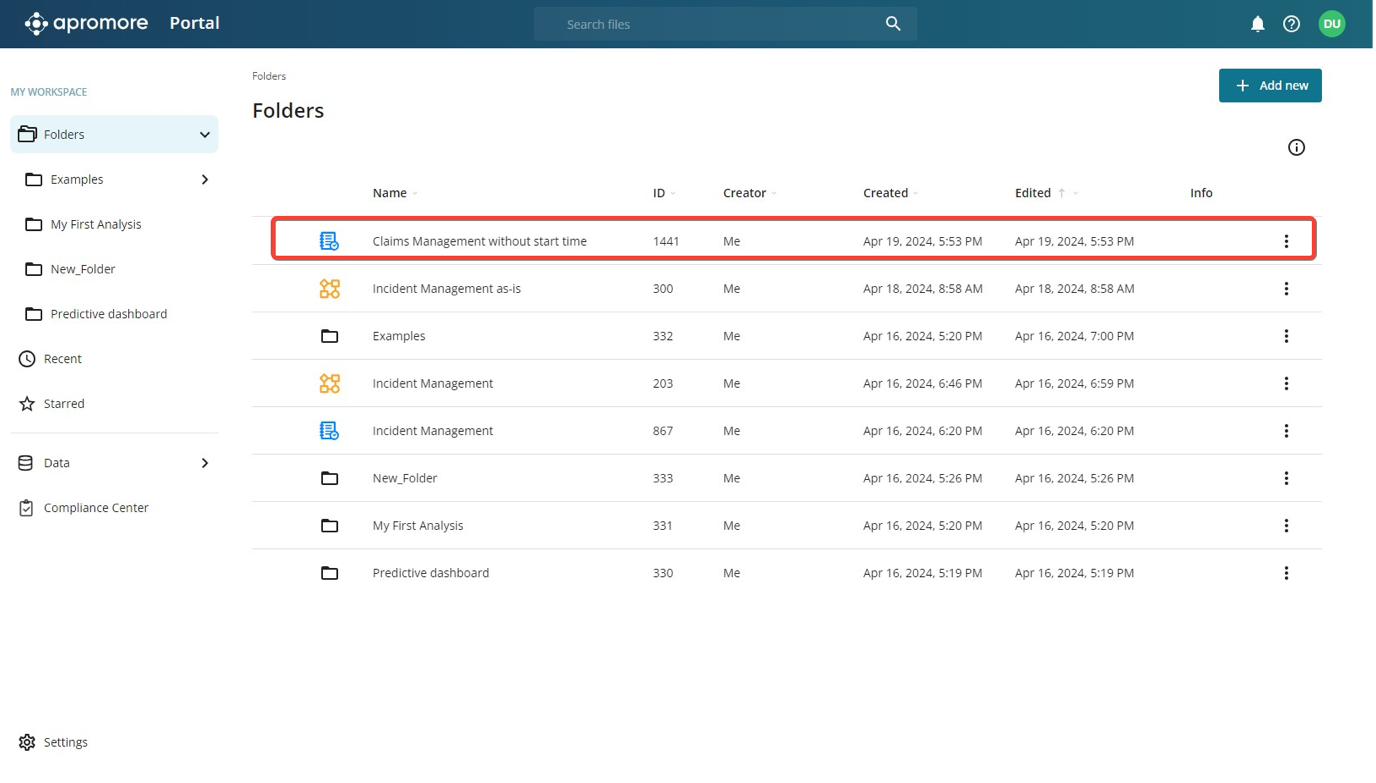
The successfully imported log will be placed in the current folder in the Apromore workspace. Apromore internally stores files in XES format.
Warnings or errors during log import
A log file containing invalid data may be uploaded using the Log importer.
Examples of invalid data include a timestamp that does not match the actual timestamp entered during log import, missing case IDs, activity names, end
timestamp, etc.
When such a log is imported, a warning icon  appears next to the log name in the Workspace.
For instance, in the log below, the second row of the start timestamp has a wrong date format. There are also missing values in the Activity, Role, and Resource columns.
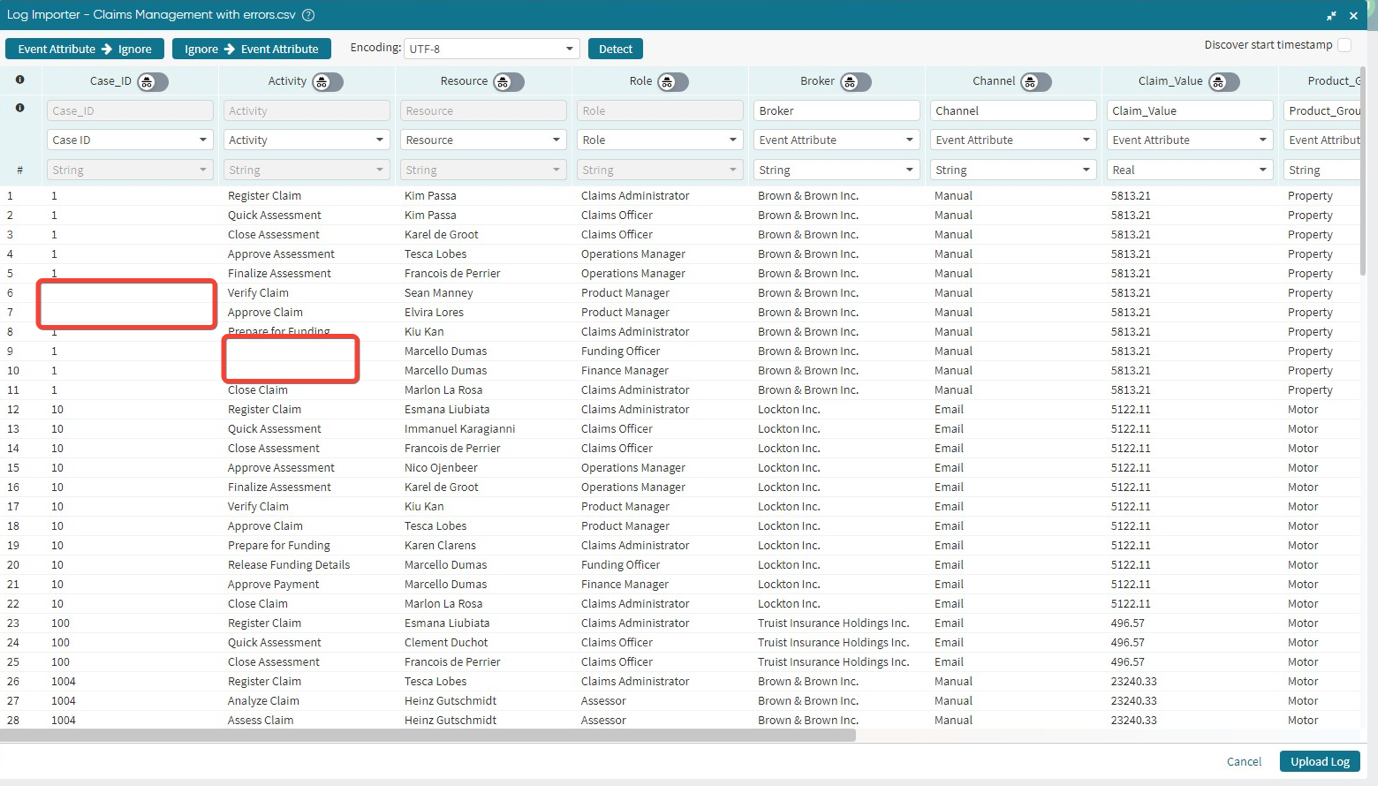
When we import the log, we get the warning sign.

Clicking the warning sign shows the exact invalid entries in the log file.

Click Download error report to download the error report that includes the first 1000 errored rows. We can also delete the log from our Apromore Workspace by clicking Discard log.
Upload a file from the Web or Cloud
We can also upload a file from Dropbox, Google Drive, and Microsoft OneDrive. To upload a file from the web or cloud, click Add new.

Click File upload.

Switch to the “Upload from Web or cloud” tab.
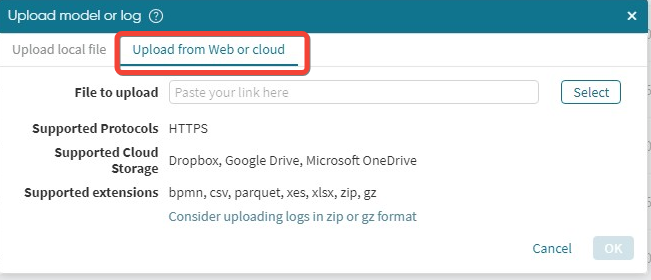
Note
The supported file formats are bpmn, csv, XLSX, XES, XES.gz, zip and parquet.
Upload from Microsoft OneDrive
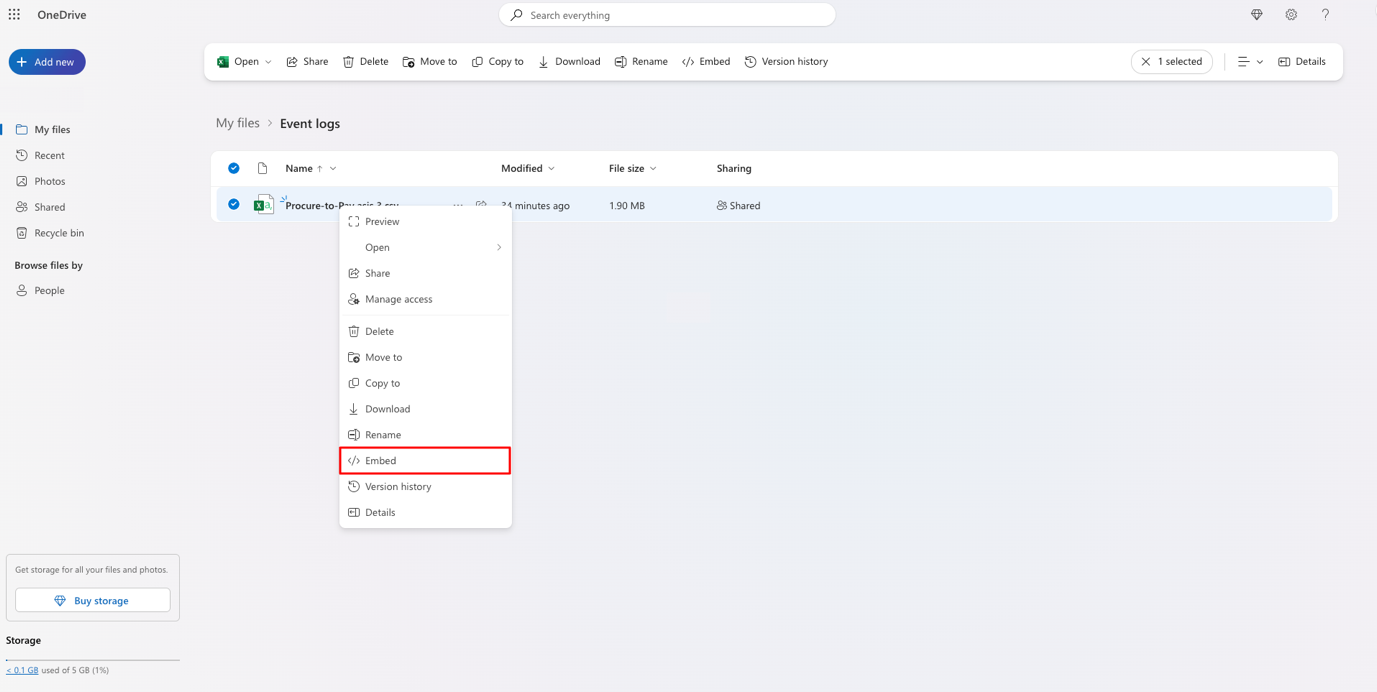
In Microsoft OneDrive, right-click on the file we want to upload and click on Embed.
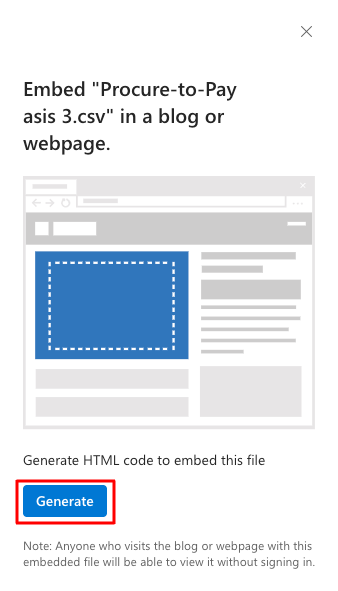
Once the Embed drawer opens, click on the Generate button to generate the URL of the file.
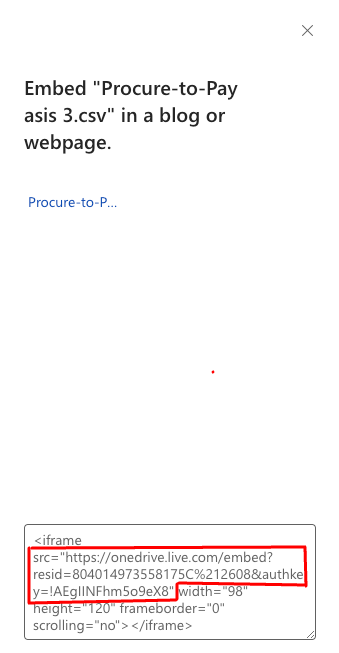
Once the link is generated, copy the link contained in the inverted commas (” “) of the iframe src parameter in the embed code snippet.
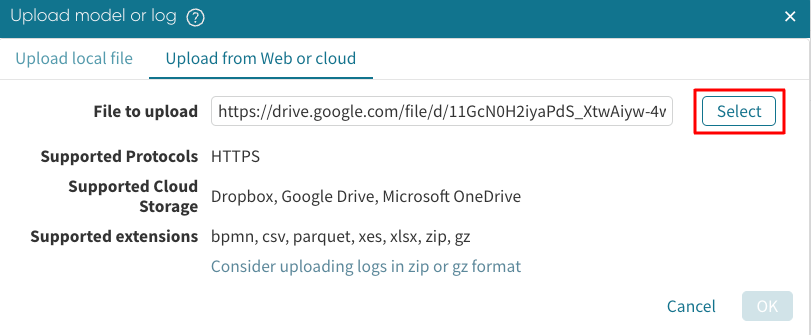
Paste the link to the File to upload input box and click Select.
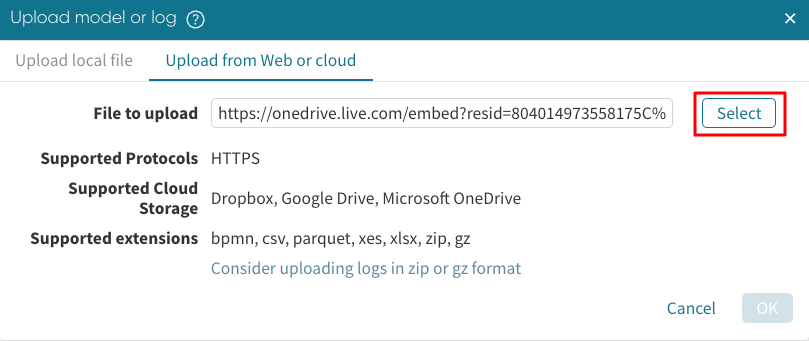
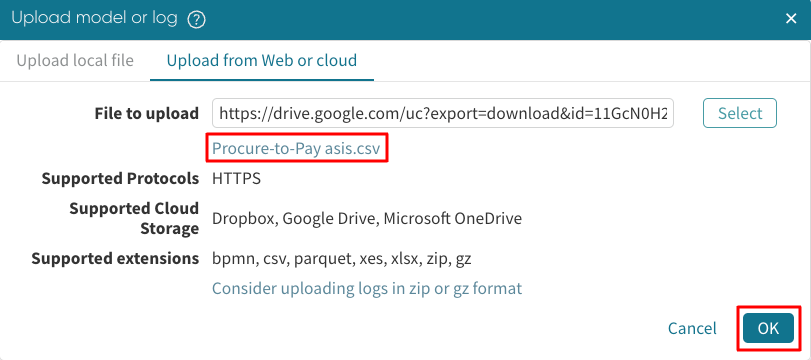
Once we click on Select, the file name will be displayed as highlighted below. Click OK to upload the file.
The log will be successfully uploaded in the Apromore workspace.
Upload from Google Drive
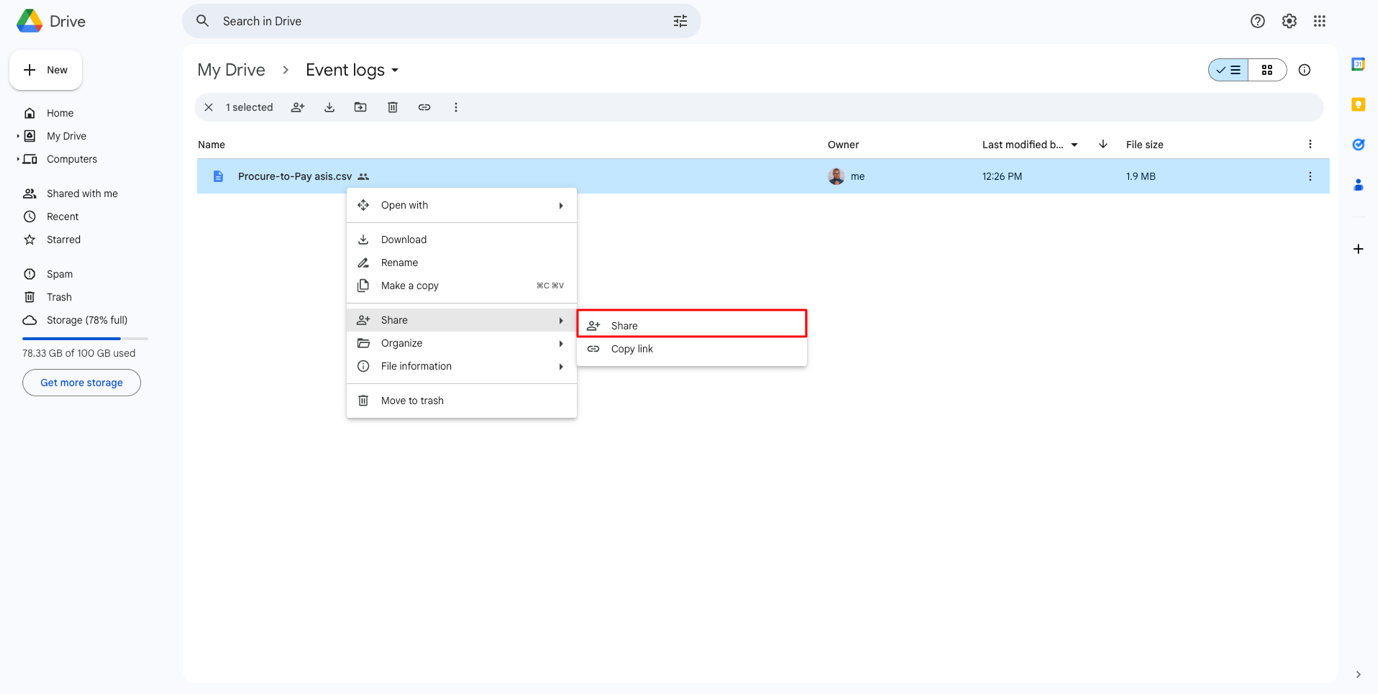
To upload a file from Google Drive, right-click on the file we want to upload and click Share.
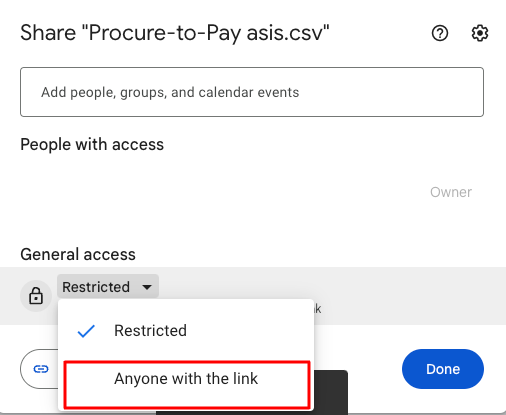
Once the share window opens up, change the General access to Viewer.
Note
Make sure the file’s access is set to Anyone with the link.
Once the sharing permissions are set, click Copy link to copy the URL of the file.
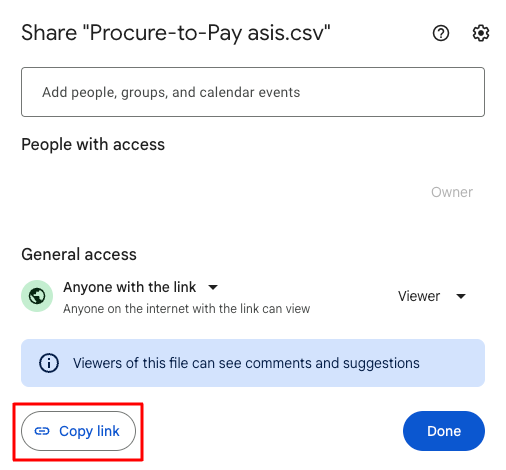
Paste the link to “File to upload” input box and click Select.
Once you click on Select, the file name will be displayed as highlighted below. Click OK to upload the file.
The log will be successfully uploaded in the Apromore workspace.
Note
Similarly, to upload a file from Dropbox, make sure the file’s visibility is set to Anyone with the link.
Paste the link to the File to Upload input box under the Upload file from URL tab to upload the file in Apromore successfully.
Anonymize an event log
We can anonymize one or more columns during the log import to keep sensitive data private and secure.
For example, we can import the log with encrypted resources names.
Begin by uploading an event log from Portal. Click Add new.
Click File upload.
Select the event log we wish to upload.
In the Log Importer window that appears, choose the column we would like to anonymize and select the Incognito toggle by swiping towards
right  button.
Click on Upload Log.
Enter the name and description of the log. Click OK.

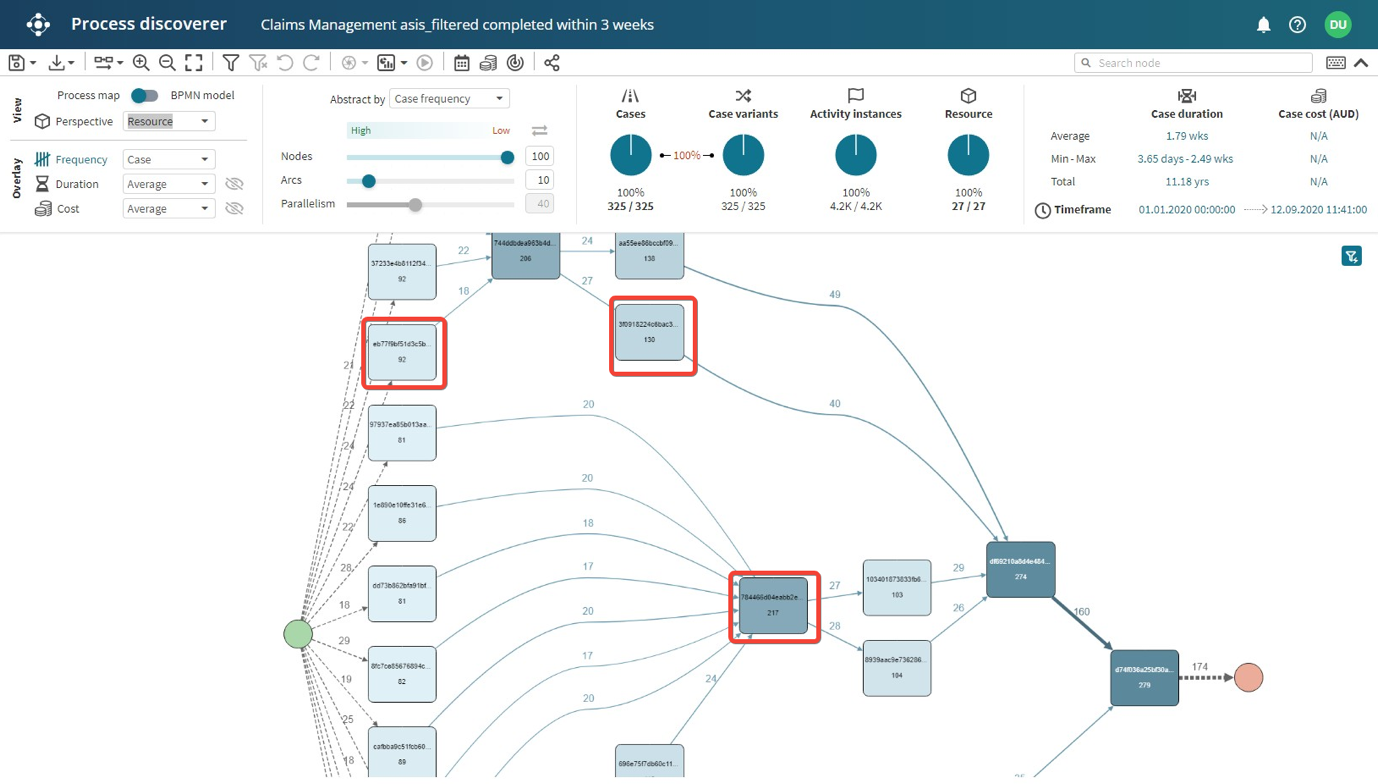
To check whether the anonymization was done successfully, go back to the Portal and open the uploaded log.
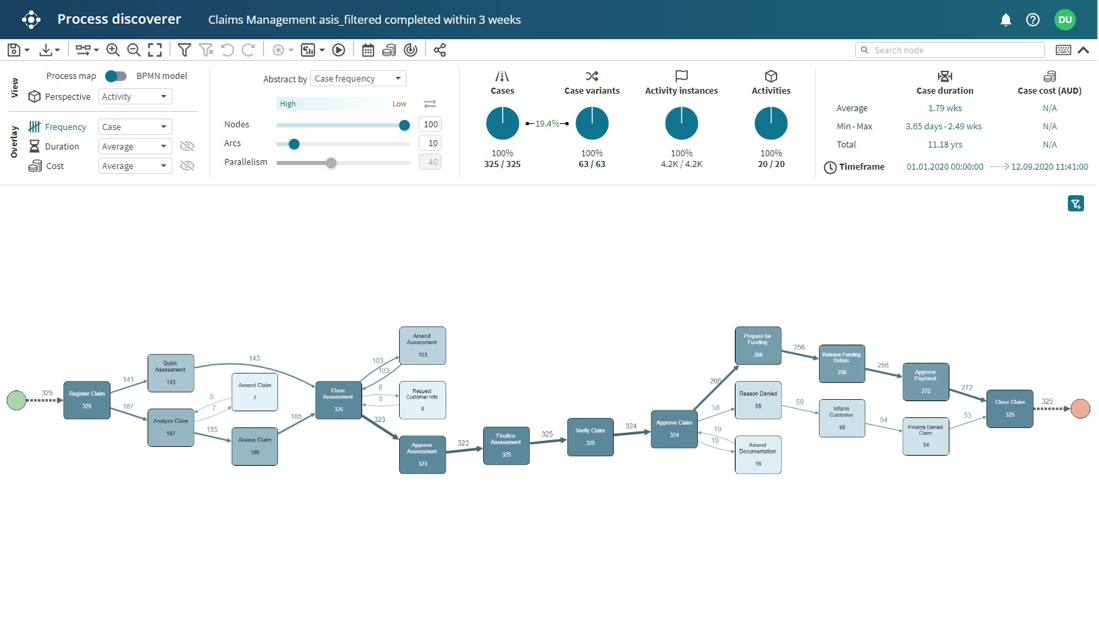
Switch the perspective to view that attribute.
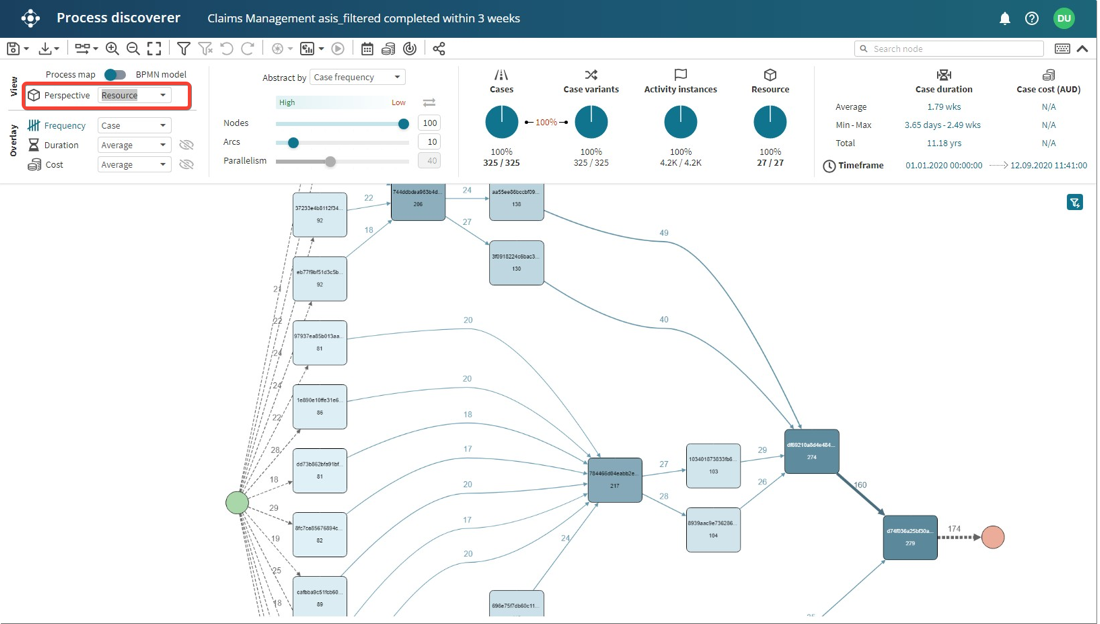
Encrypted texts codes are displayed rather than the actual resources names. This indicates that we have successfully anonymized the resource column.